How to Continuously Deploy a Heroku App with Azure DevOps

Photo by Scott Blake on Unsplash
If you create Heroku apps, you know that the only built-in options for deployment are 1) the Heroku CLI or 2) integration with a github repo. If you don’t want your application’s code to be publicly accessible, this results in a tedious routine of manually pushing your changes to Heroku. With Azure DevOps, you can create flexible build pipelines to automate various tasks: running tests, creating binaries, publishing artifacts, etc. In this post, I will go through the steps to create a simple build pipeline that automatically pushes the latest code to Heroku when changes are committed to a Azure DevOps repo.
Creating a New Build Pipeline
Creating a project in Azure DevOps gives you more than a private git repository. With Build Pipelines, you can quickly create a CICD process. Navigate to your project’s build piplelines by clicking on the blue rocketship icon. If you have never created a build pipeline for this project, you will be directed to create one as shown in Figure 1. Otherwise, select New -> New build pipeline as shown in Figure 2:

Figure 1 - First build pipeline
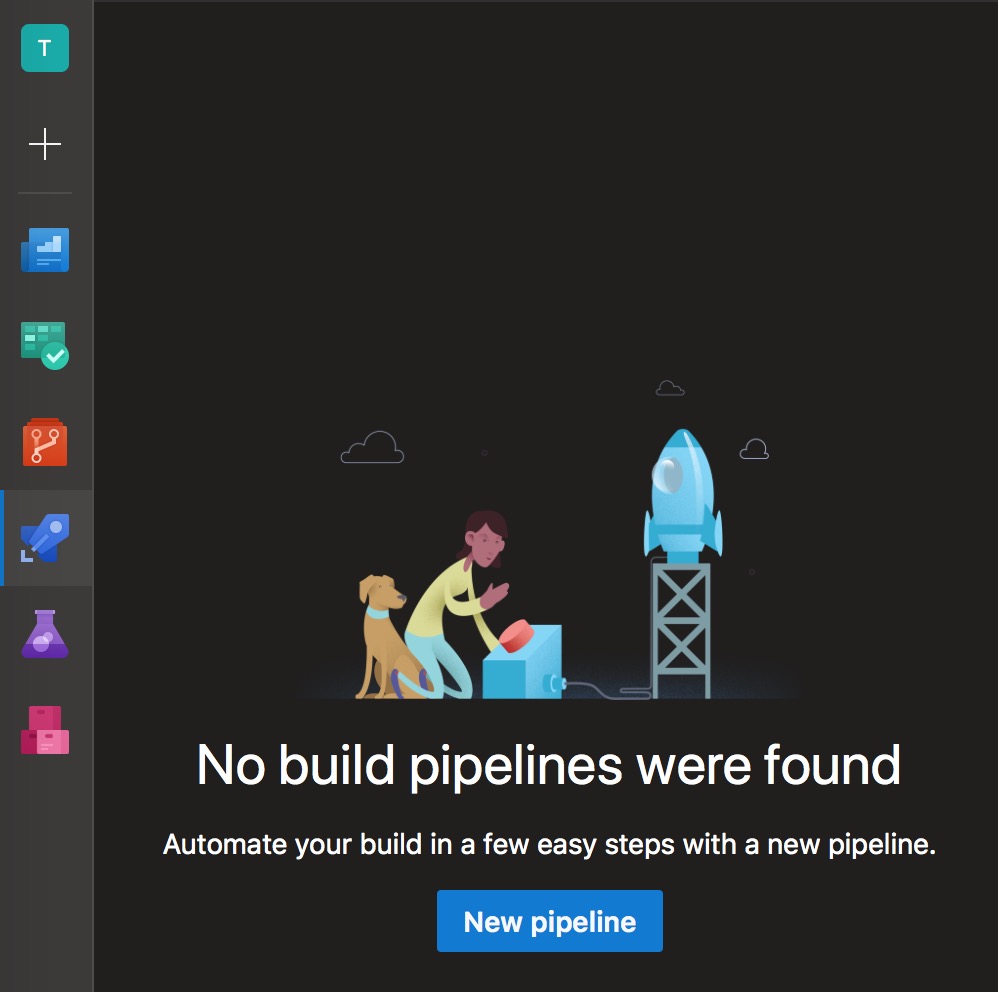
Figure 2 - New build pipeline
First, you must select the repository that contains your heroku app. Leave Azure Repos Git selected and choose the repo from the dropdown list. Then, click Continue (Figure 3):
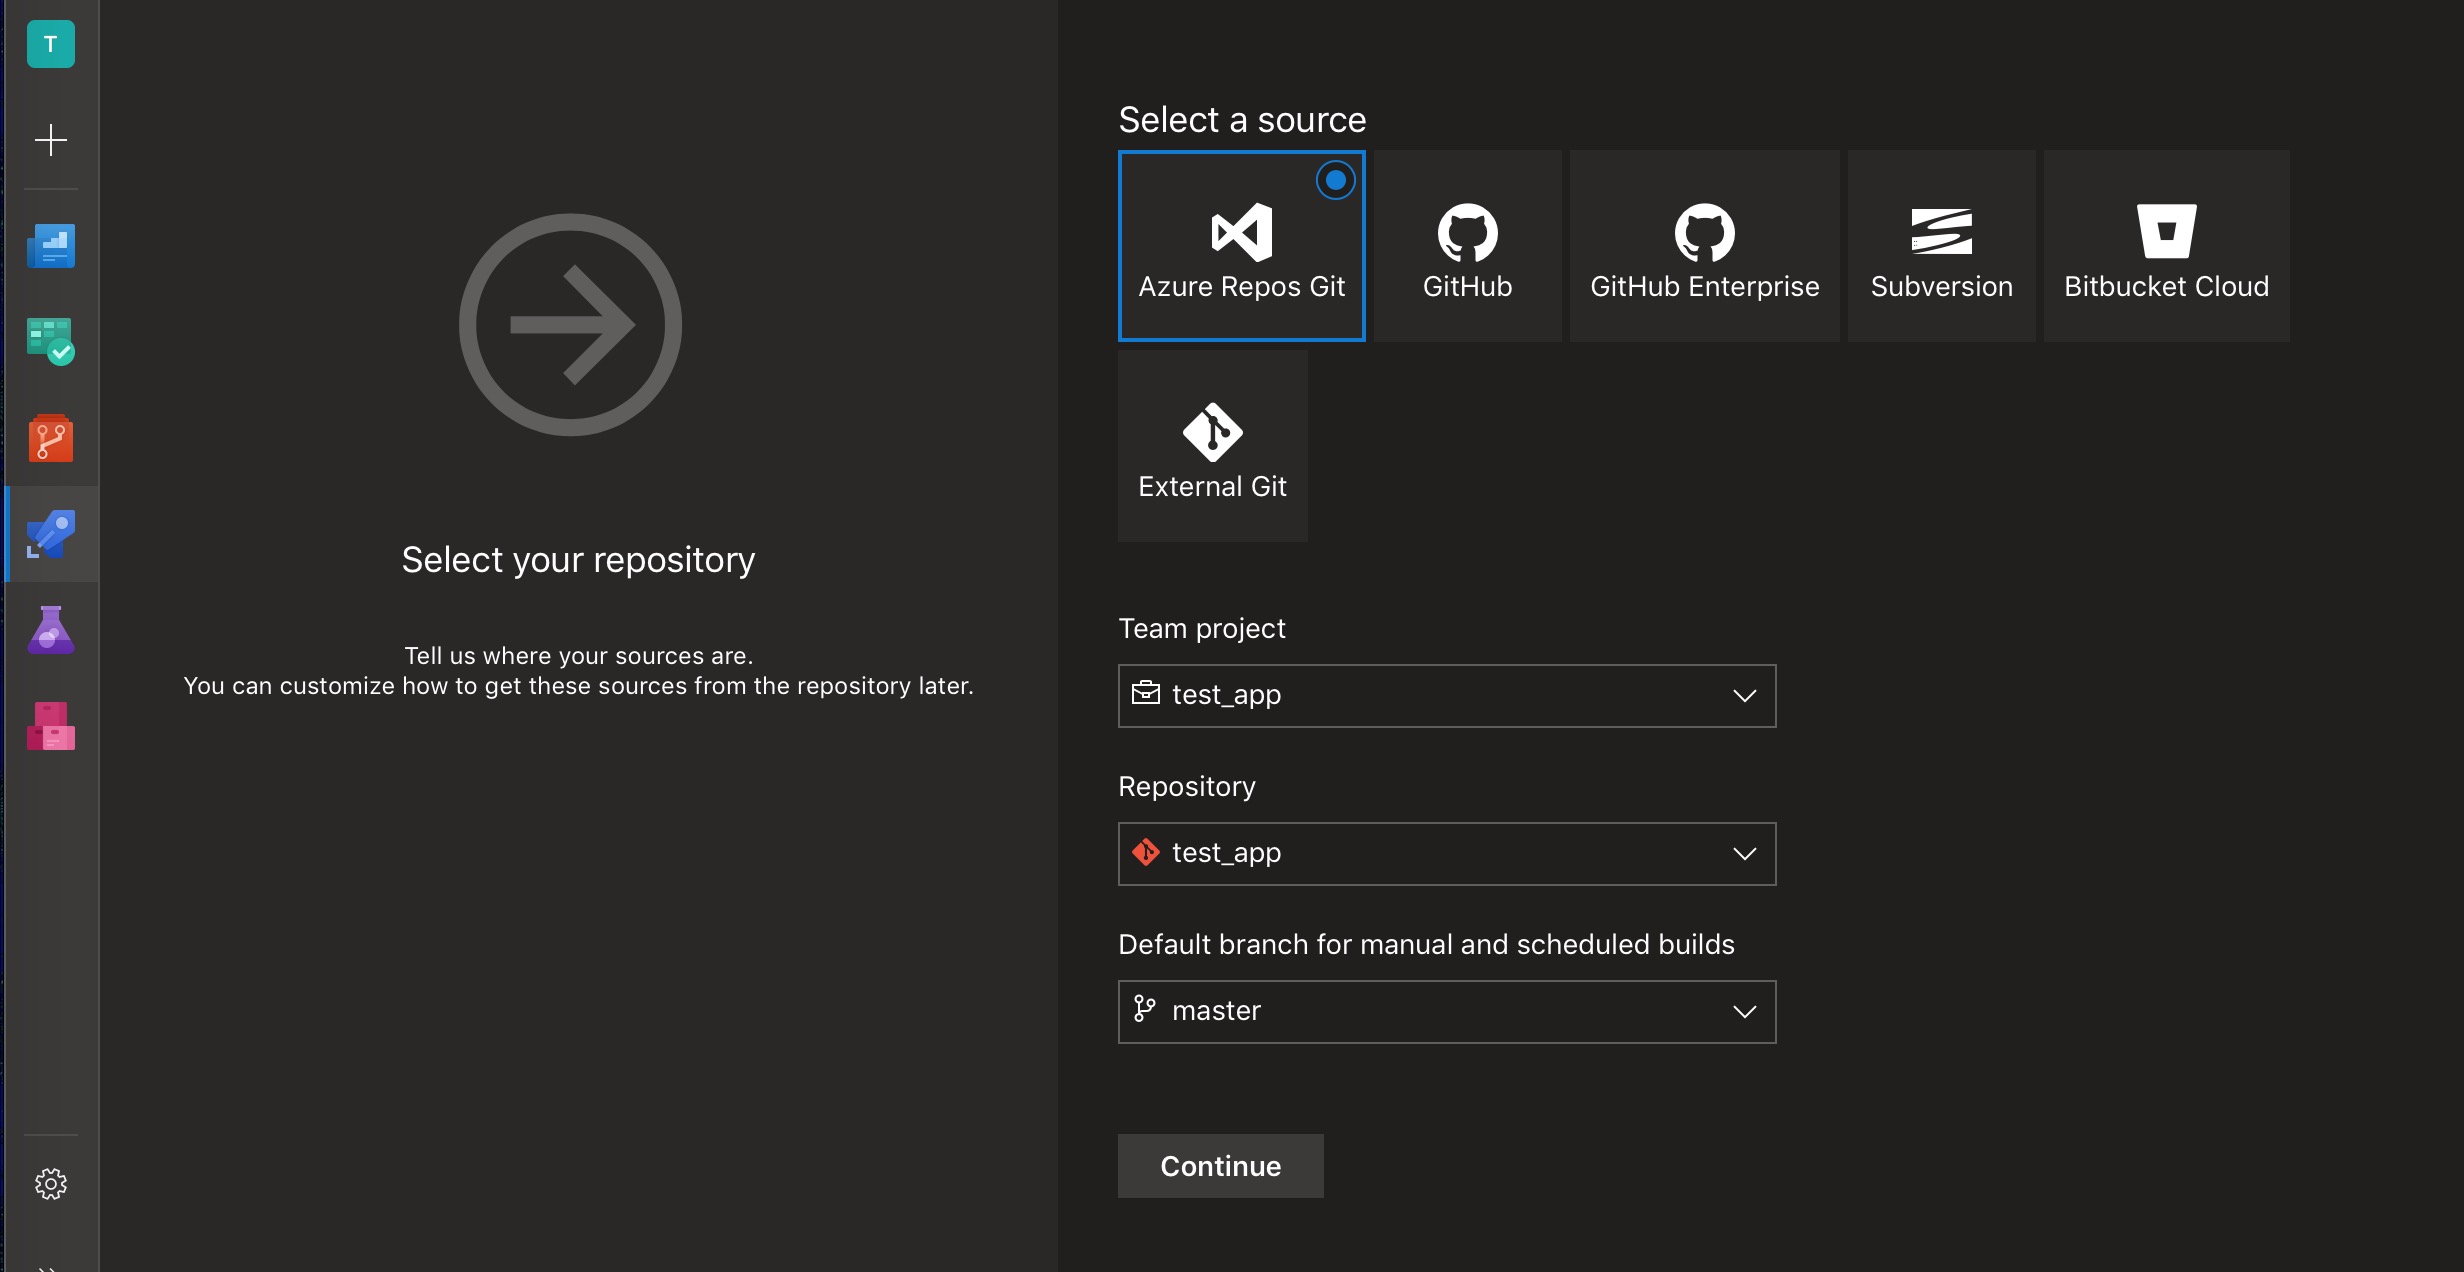
Figure 3 - Select a source repository
Next, you are asked to select a template. You can find templates for many technologies/tools, but since we are creating a simple CD process, scroll to the bottom and select Empty pipeline (Figure 4):
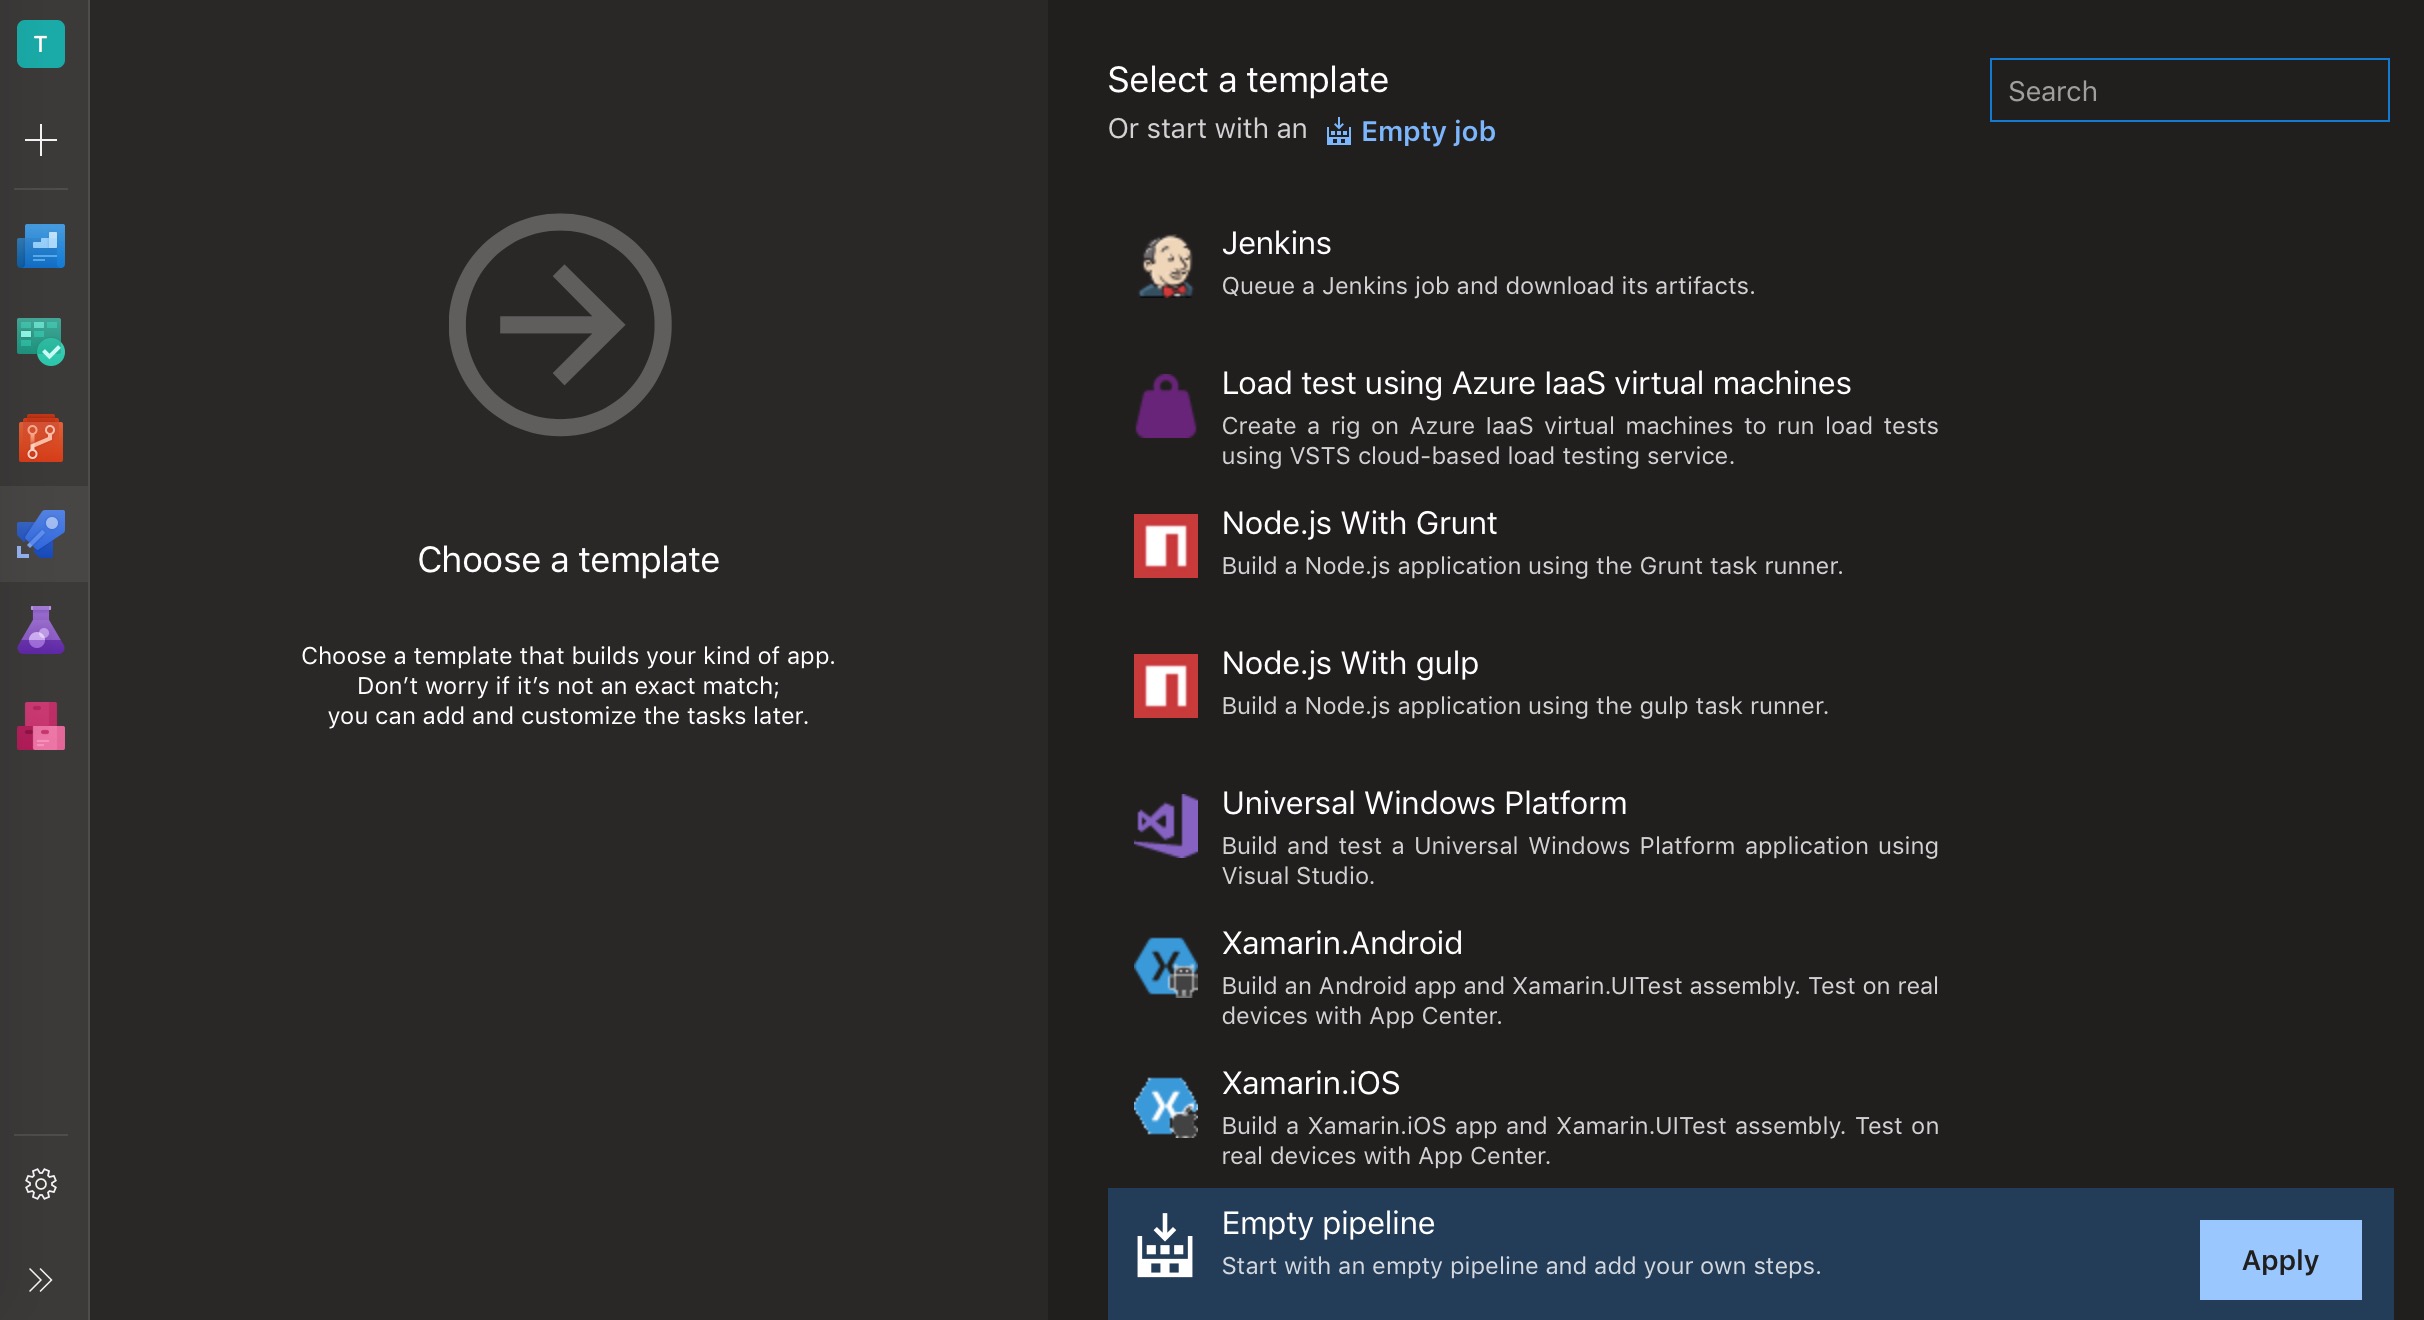
Figure 4 - Select a Template
You should see the empty pipeline shown in Figure 5. Notice that you are currently viewing the Tasks section of the pipeline. Change the name to “Deploy to Heroku” or anything else you like. You can leave the value for Agent pool as Hosted VS2017:
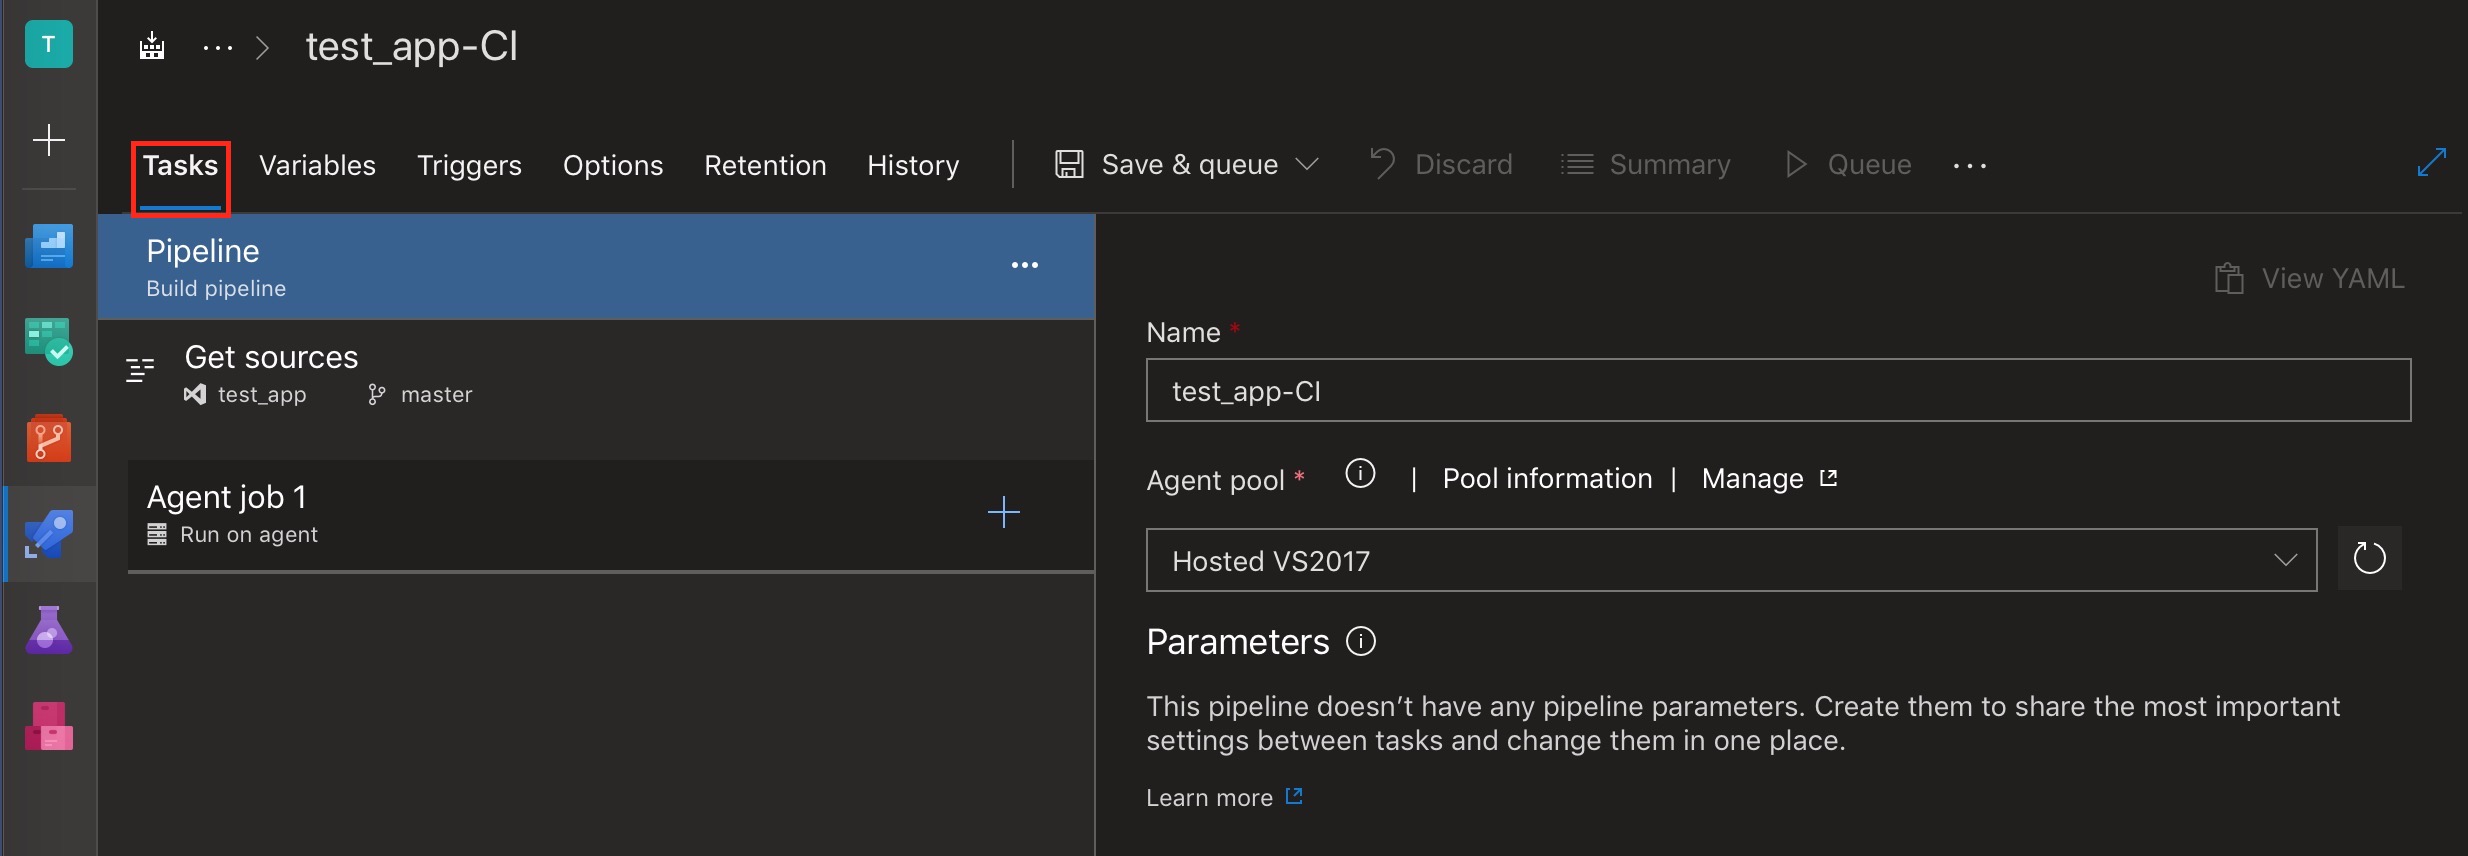
Figure 5 - Empty pipeline
Enabling Continous Integration
Currently, this pipeline is not configured to run in response to any trigger. In fact, it will never run unless you setup a schedule or enable continuous integration. To do so, Click Triggers and select the checkbox for Enable continuous integration as shown in Figure 6.
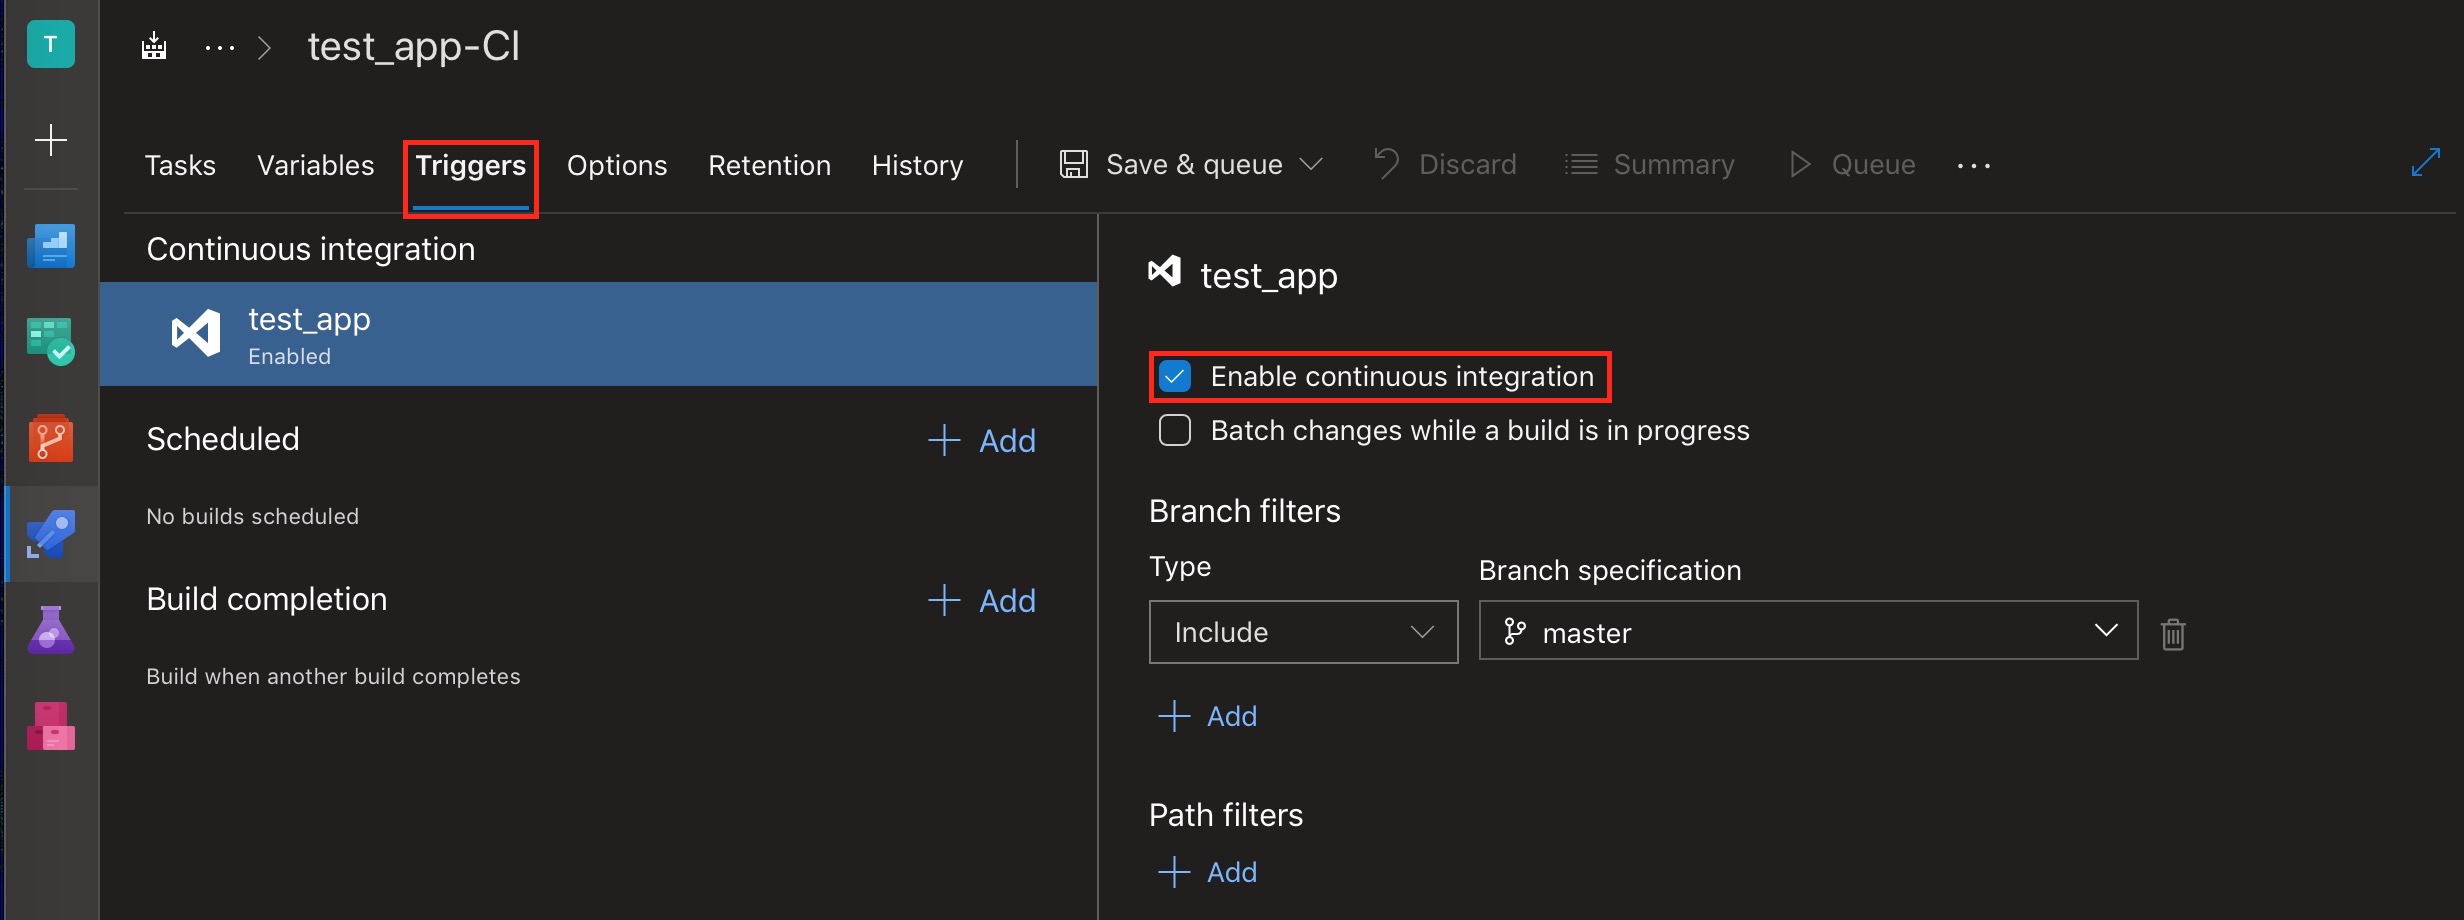
Figure 6 - Trigger settings
Now this pipeline will run whenever a commit is made to the master branch of your repo. You can make this behavior more fine-grained if you wish, by selecting a different branch or adding a path filter in the Branch Filters section.
Obtaining a Heroku API Token
In order to make code changes to your Heroku app, you must authenticate yourself. Normally this is handled for you by the Heroku CLI. When you first run heroku login an API token is generated and stored in a ~/.netrc file on your machine. To see the value of your API token, you can run heroku auth:token or cat ~/.netrc. This default token is silently used for all further CLI interactions with Heroku, and it can also be used to push changes from our build pipleline.
However, there are two reasons why this may not be the best token to use for our CD process. 1) The default token expires one year after being generated. 2) The default token will be immediately expired if you run heroku logout. Obviously we do not want our build pipeline to fail unexpectedly when the default token expires. To avoid this, we can create a token which never expires with the heroku authorizations:create command. For more information on Heroku API tokens, please read this support article.
As shown below, creating a API token is simple. You can also add a description to remind yourself of the intended use. For information on the possible options/values with the heroku authorizations:create command, please see the official docs.
$ heroku authorizations:create --description="azure cd token" --short
787f6805-b74a-45a0-bc58-f6a187bacff2
$ heroku authorizations
Heroku CLI             5b570a3c-3d2a-4b64-af97-7c1c69fd8f2e  global
azure cd token         787f6805-b74a-45a0-bc58-f6a187bacff2  global
Generate a new API token and have the value ready before moving on to the next step.
Creating a Pipeline Variable
Ok, back at the Azure Build Pipeline, click Variables and create a new Pipeline variable as shown in Figure 7. I recommend using a simple, short name for any build variables, so I named mine pat (personal access token).
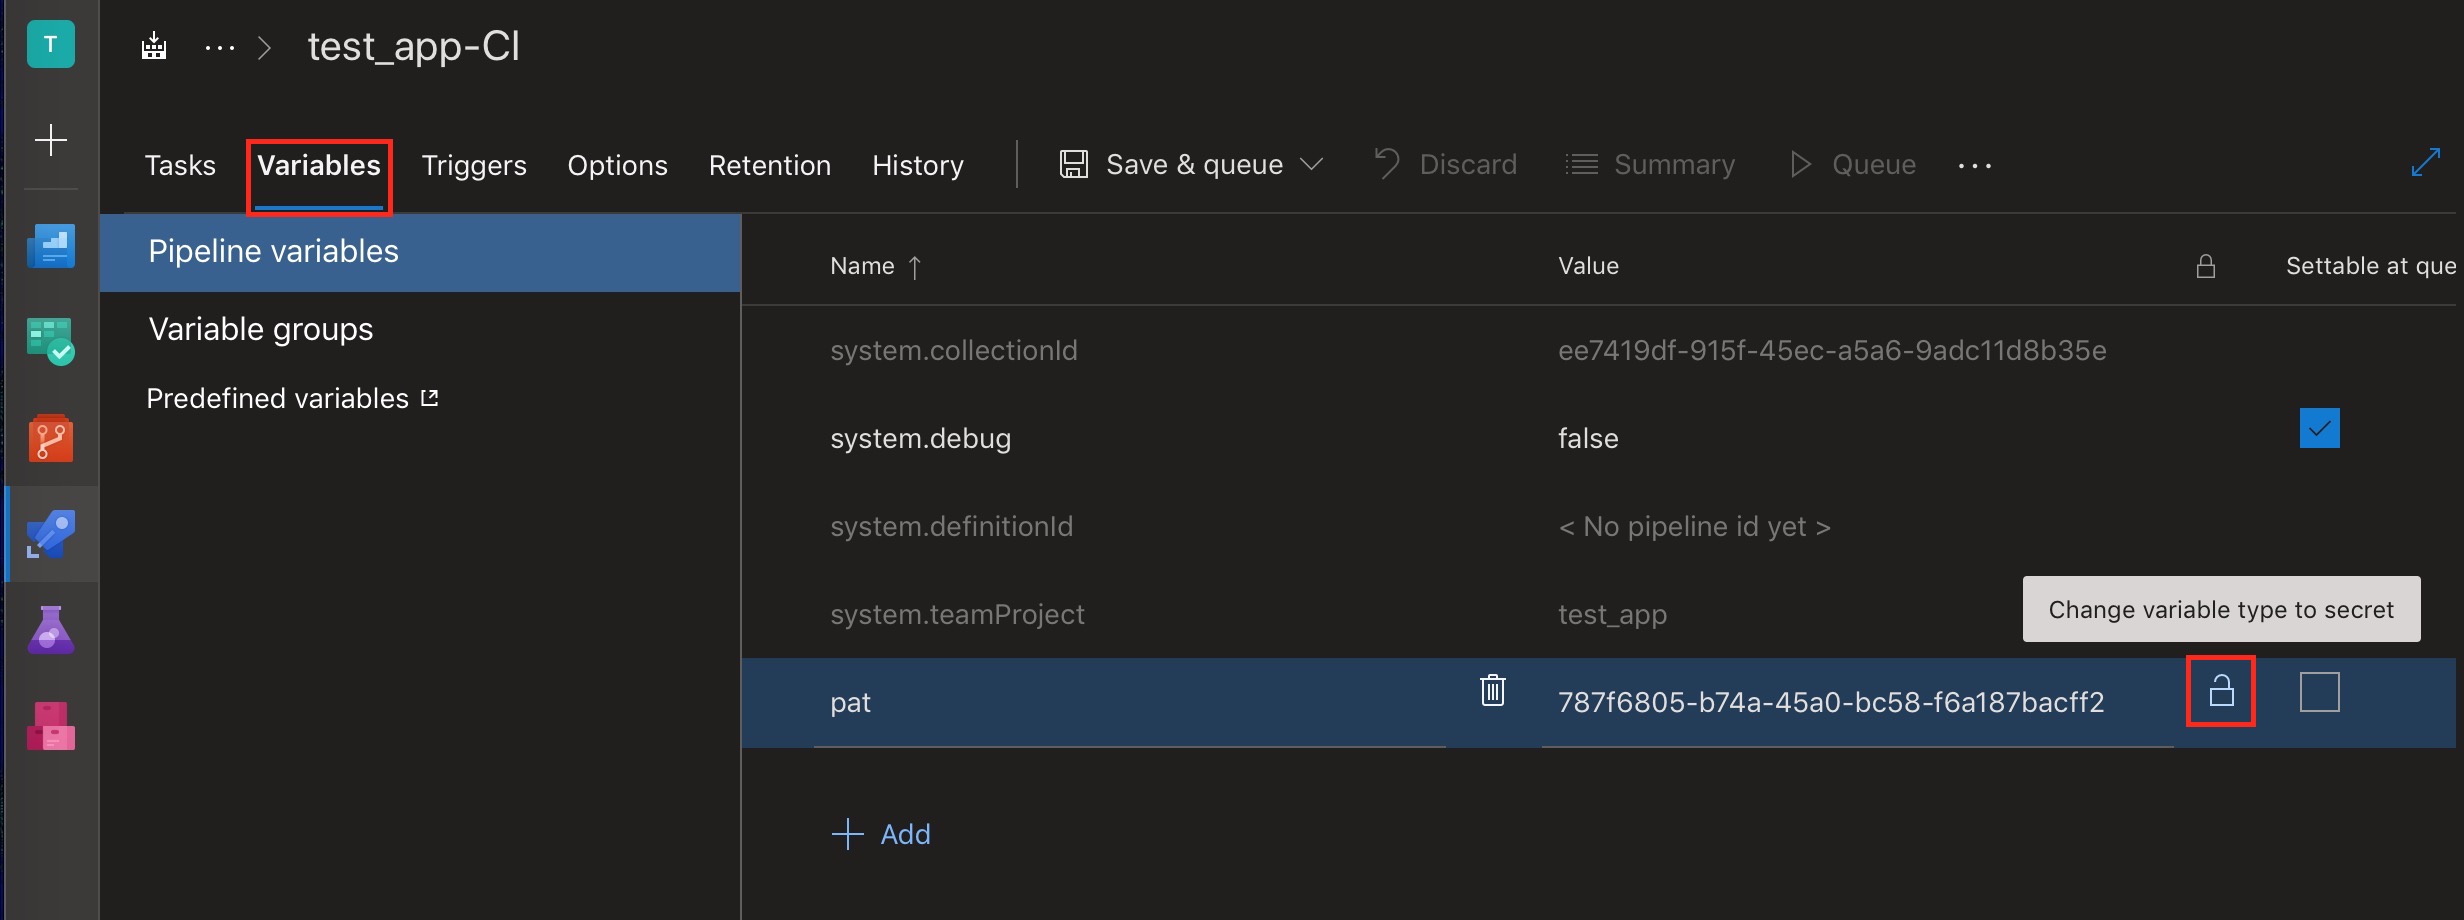
Figure 7 - Create pipeline variable for API token
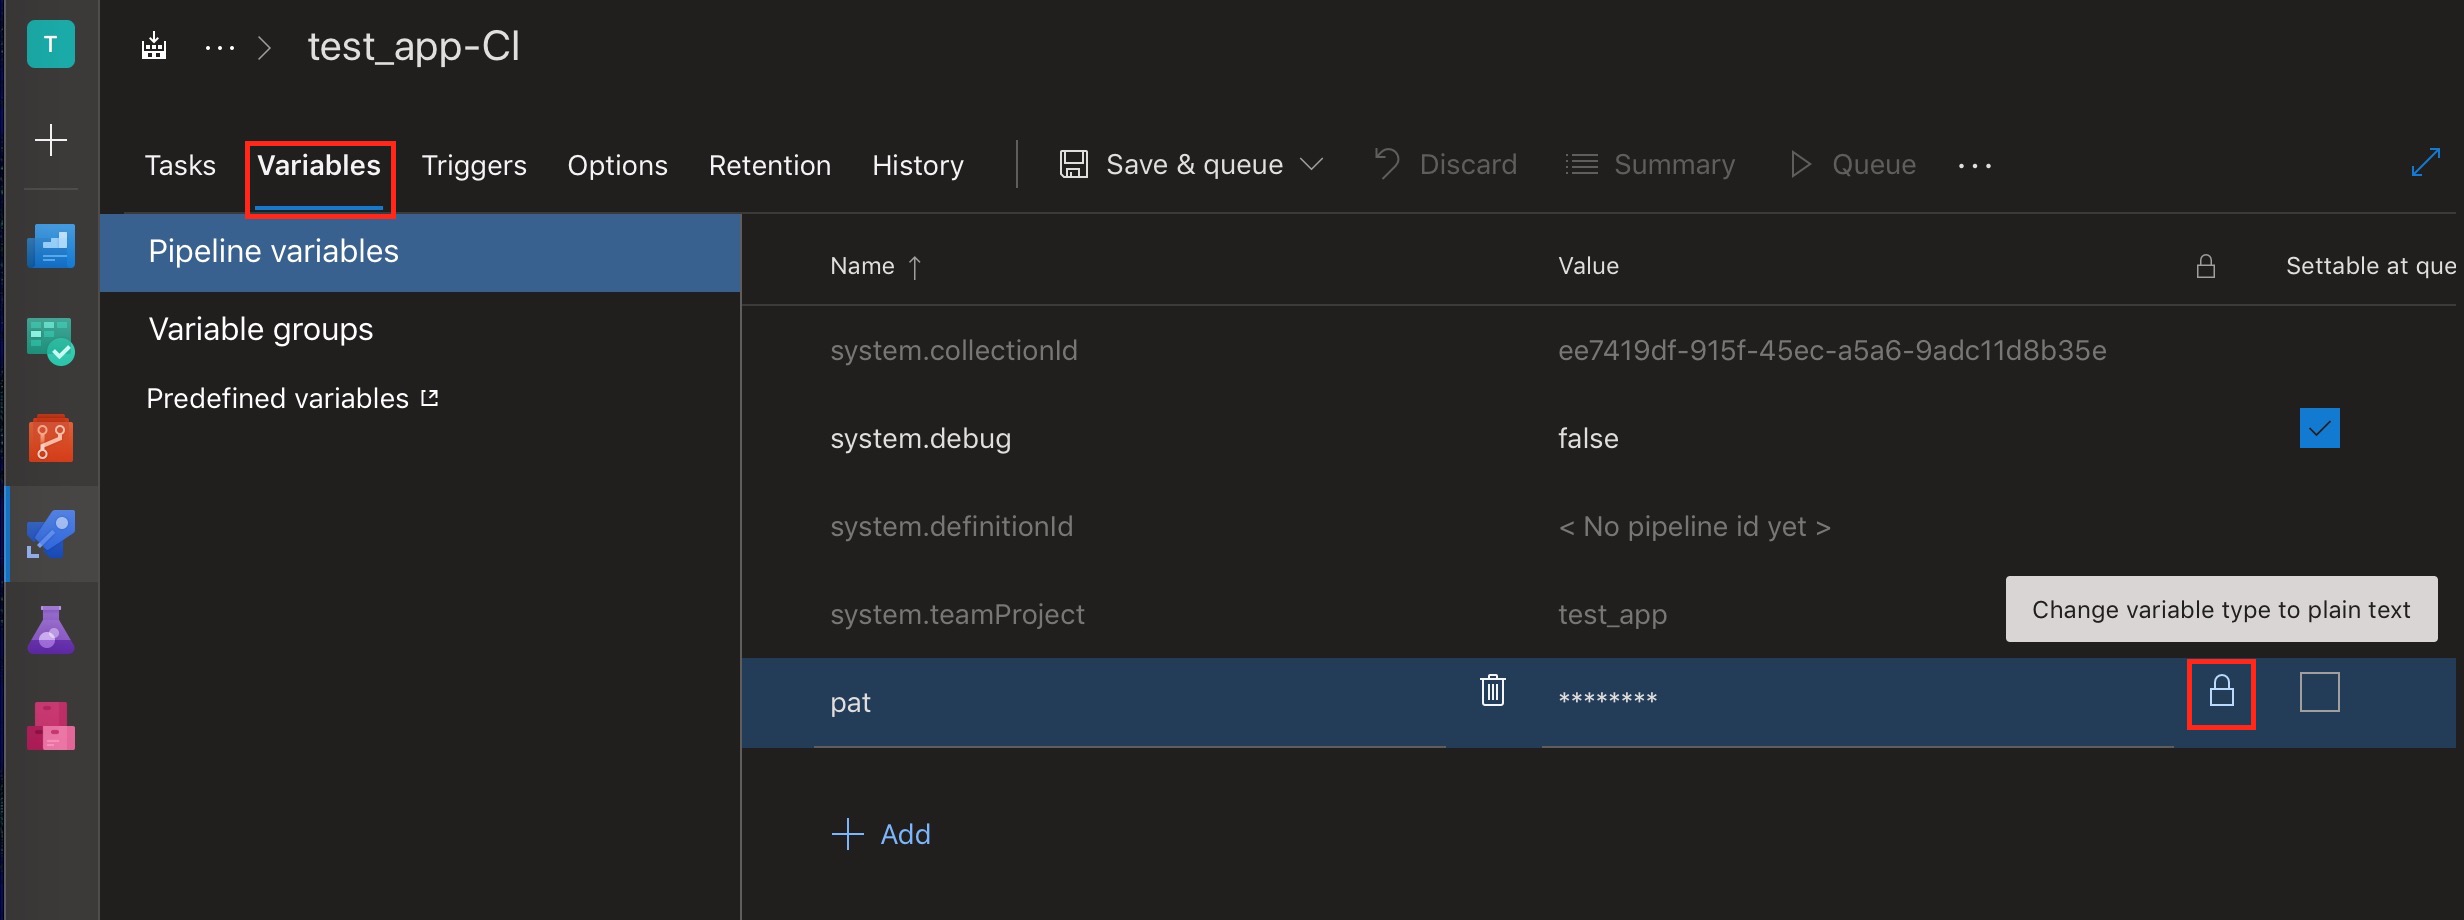
Figure 8 - Make pipeline variable secret
Configuring the Build Task
It might seem like we’ve done a lot of work up to this point, but right now our pipeline doesn’t actually do anything. Click on Tasks to return to the empty build template. Click on the symbol to add a task to Agent job 1 as shown in Figure 9:
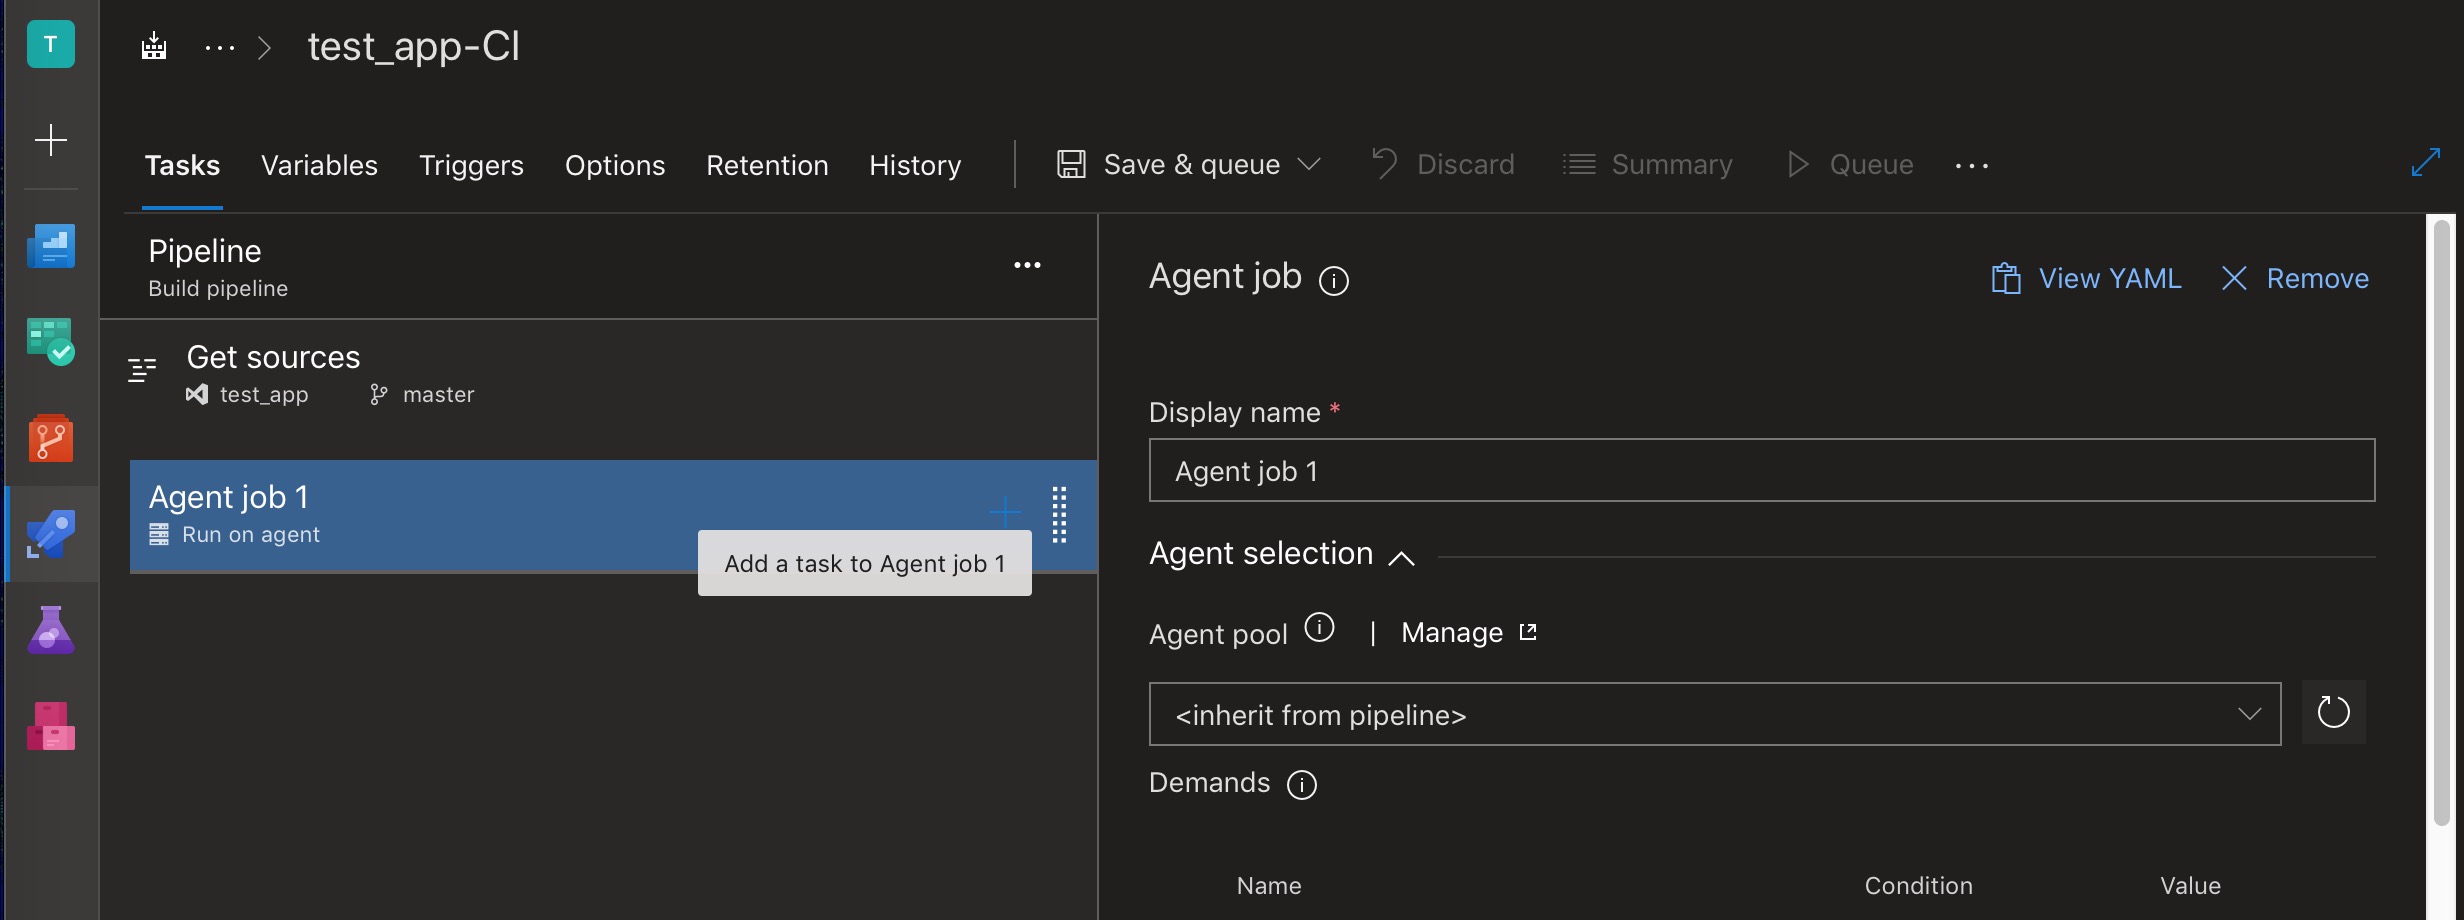
Figure 9 - Add a build task to Agent job 1
The list of tasks is pretty huge, so filter it by typing “power” or “powershell” into the search box as shown in Figure 10. Then, click the Add button to add a blank Powershell task to Agent job 1:
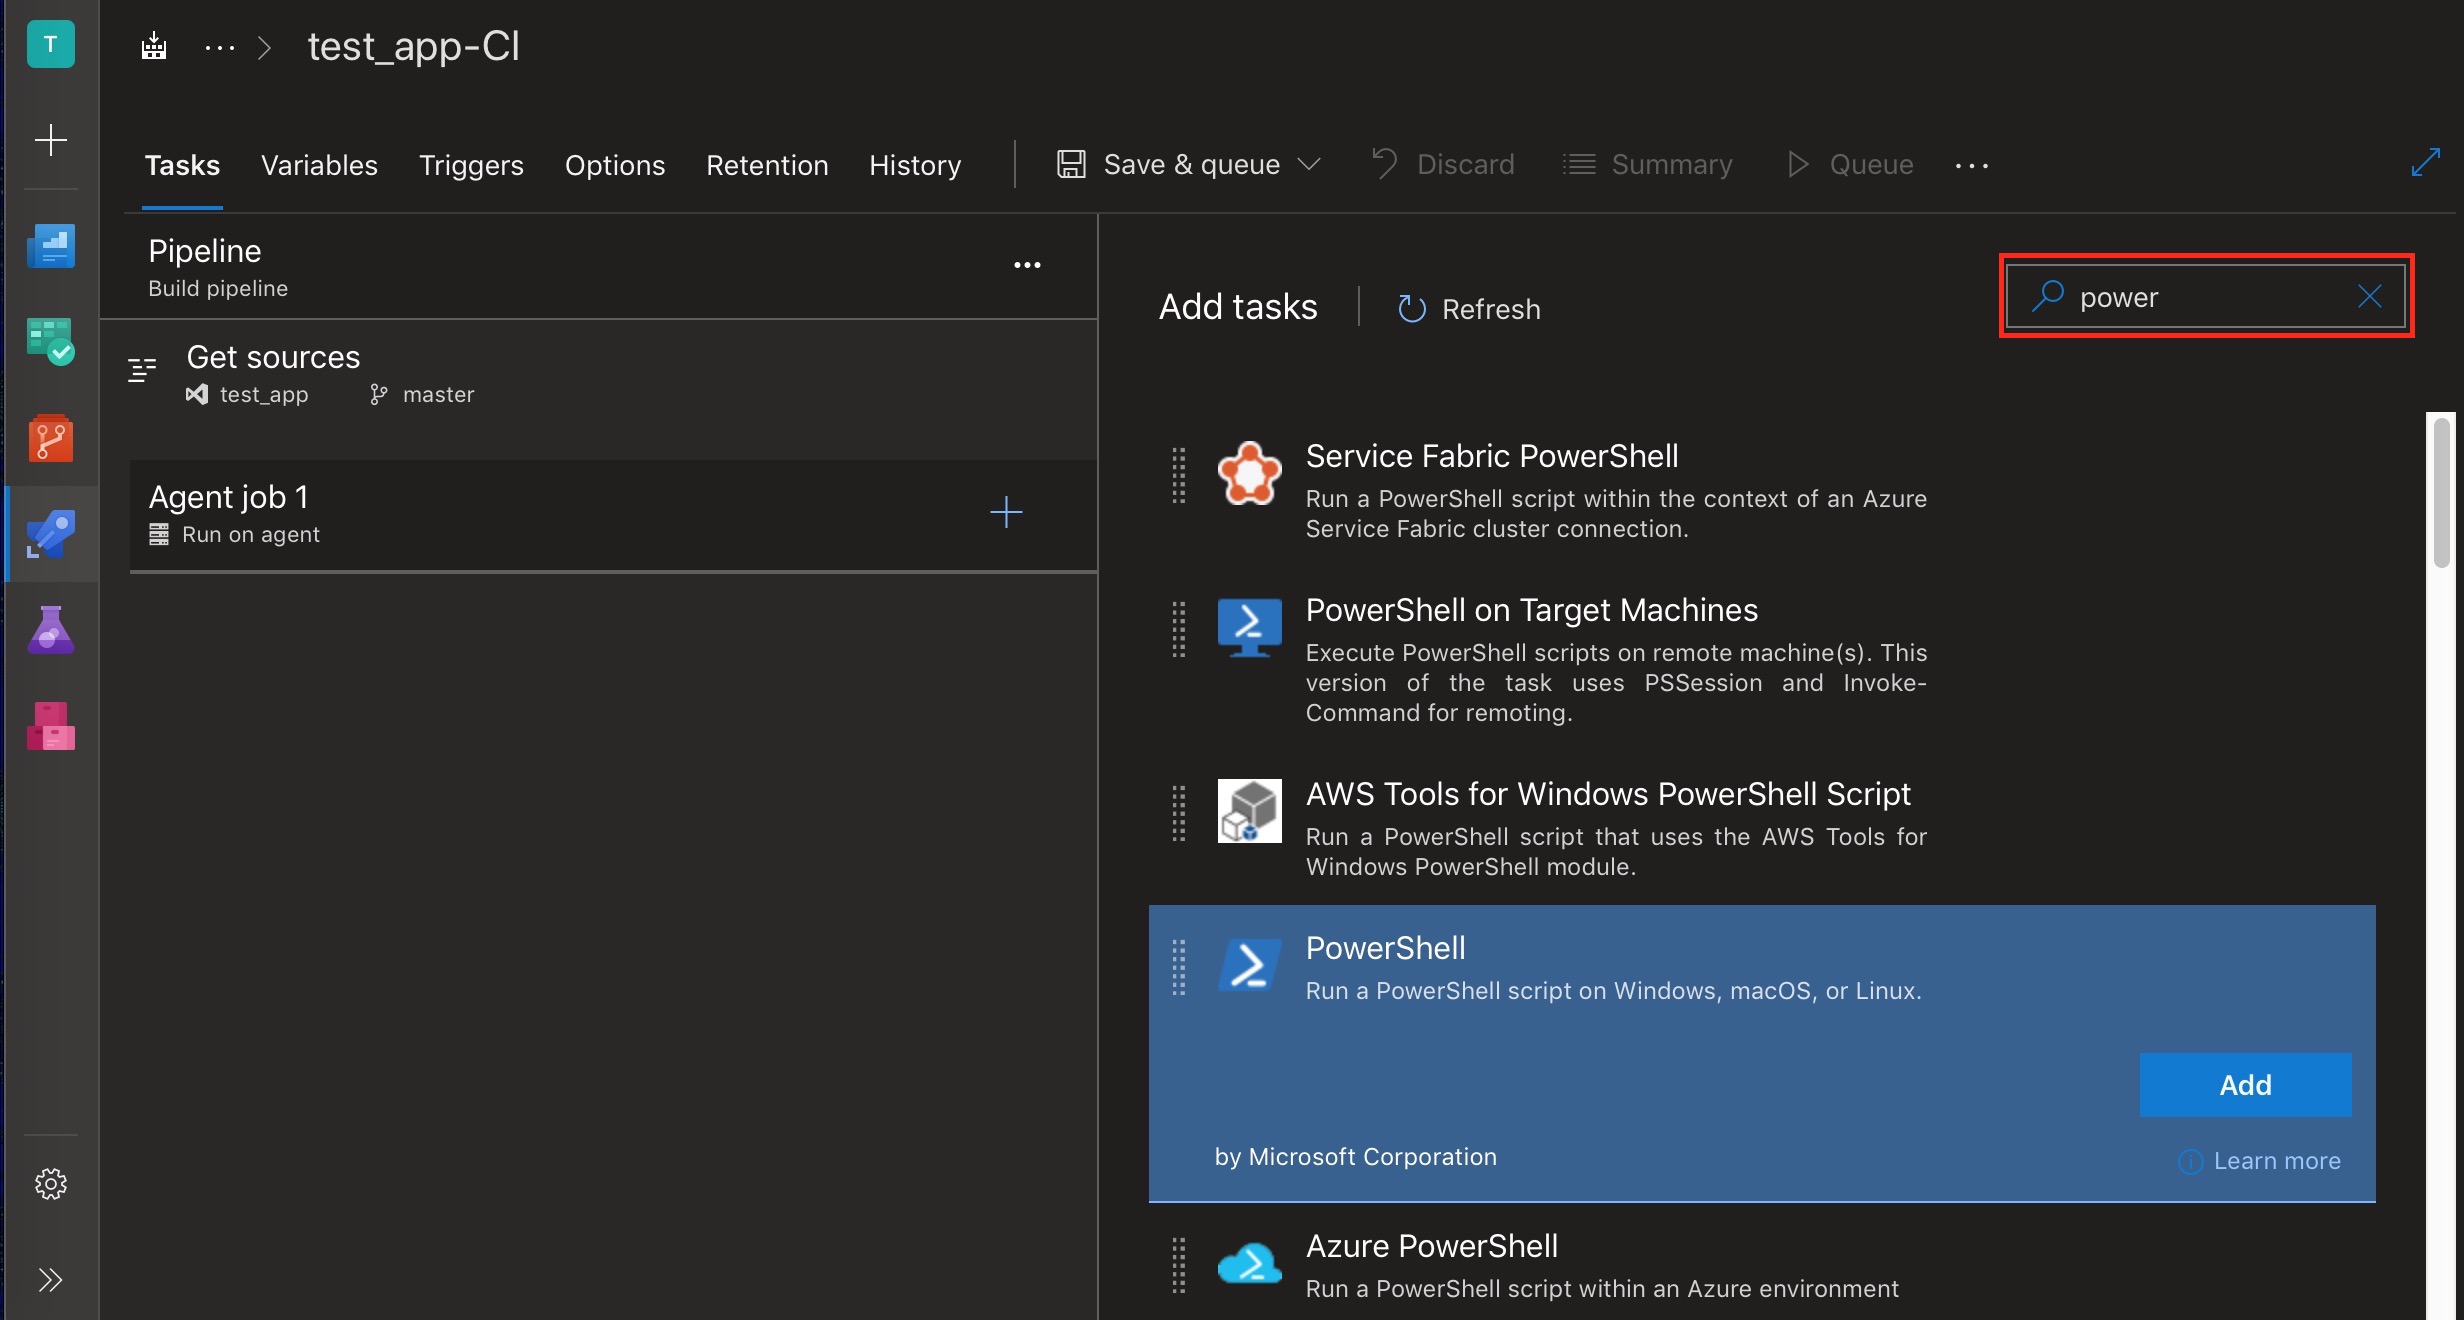
Figure 10 - Add a Powershell task
This task requires either a filepath to a Powershell script or an inline Powershell script that executes when the build is triggered. Click the radio button for Inline as shown in Figure 11:
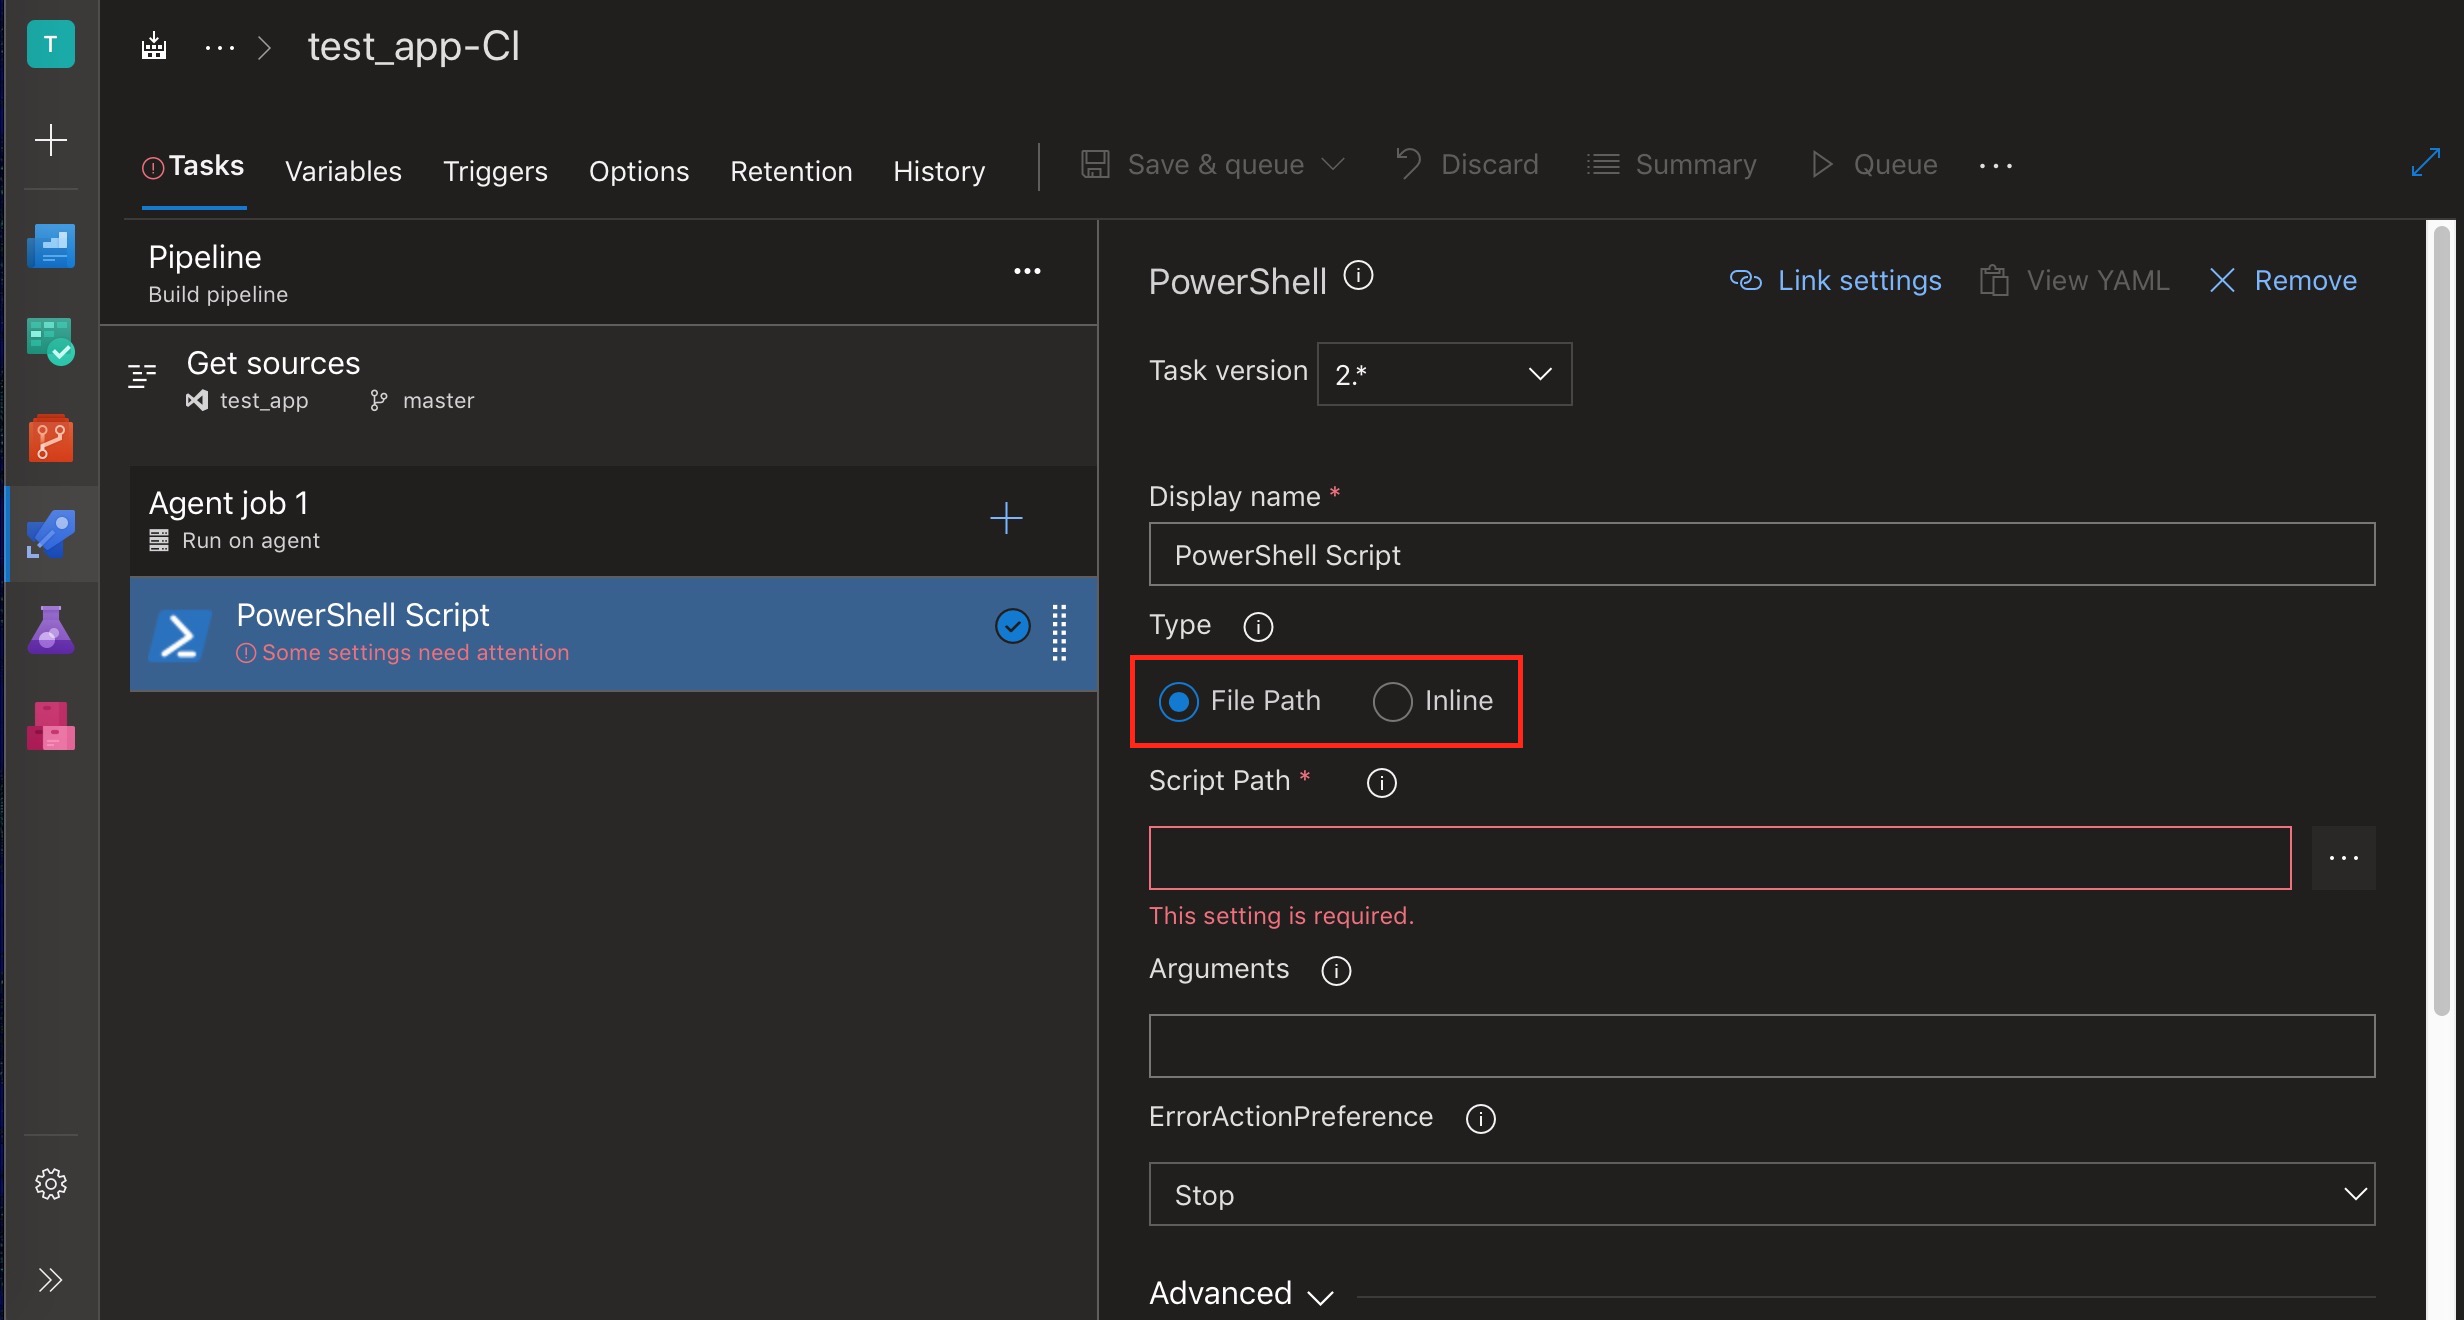
Figure 11 - Select inline for script type
What do we need our Powershell script to do, exactly? In order to push our updated code to Heroku, our script needs to do three things:
- Checkout the branch which was just updated
- Add a remote for our heroku git repo
- Push the current version of the updated branch to the heroku remote (authenticating our account with the API token we added as a pipeline variable).
Using Predefined Build Variables
Azure DevOps provides a set of predefined variables which can be referenced in build pipelines. For our Powershell script, we need to reference the name of the branch which was updated, and luckily there is a build variable which contains that exact information.
Build.SourceBranchName is the name of the branch the build was queued for ... The last path segment in the ref. For example, in
refs/heads/masterthis value ismaster.
We can insert build or pipeline variables into our Powershell script by wrapping the name of the variable in $().
Finalizing the Powershell Script
We have everything we need to create a Powershell script that pushes our latest changes to Heroku. If the name of your Heroku app is test_app and your pipeline variable containing your Heroku API token is named pat, you would enter the following three lines into the Powershell task as shown in Figure 12 (obviously, modify the script to match the name of your Heroku app and pipeline variable):
git checkout $(Build.SourceBranchName)
git remote add heroku https://heroku:$(pat)@git.heroku.com/test_app.git
git push heroku $(Build.SourceBranchName)
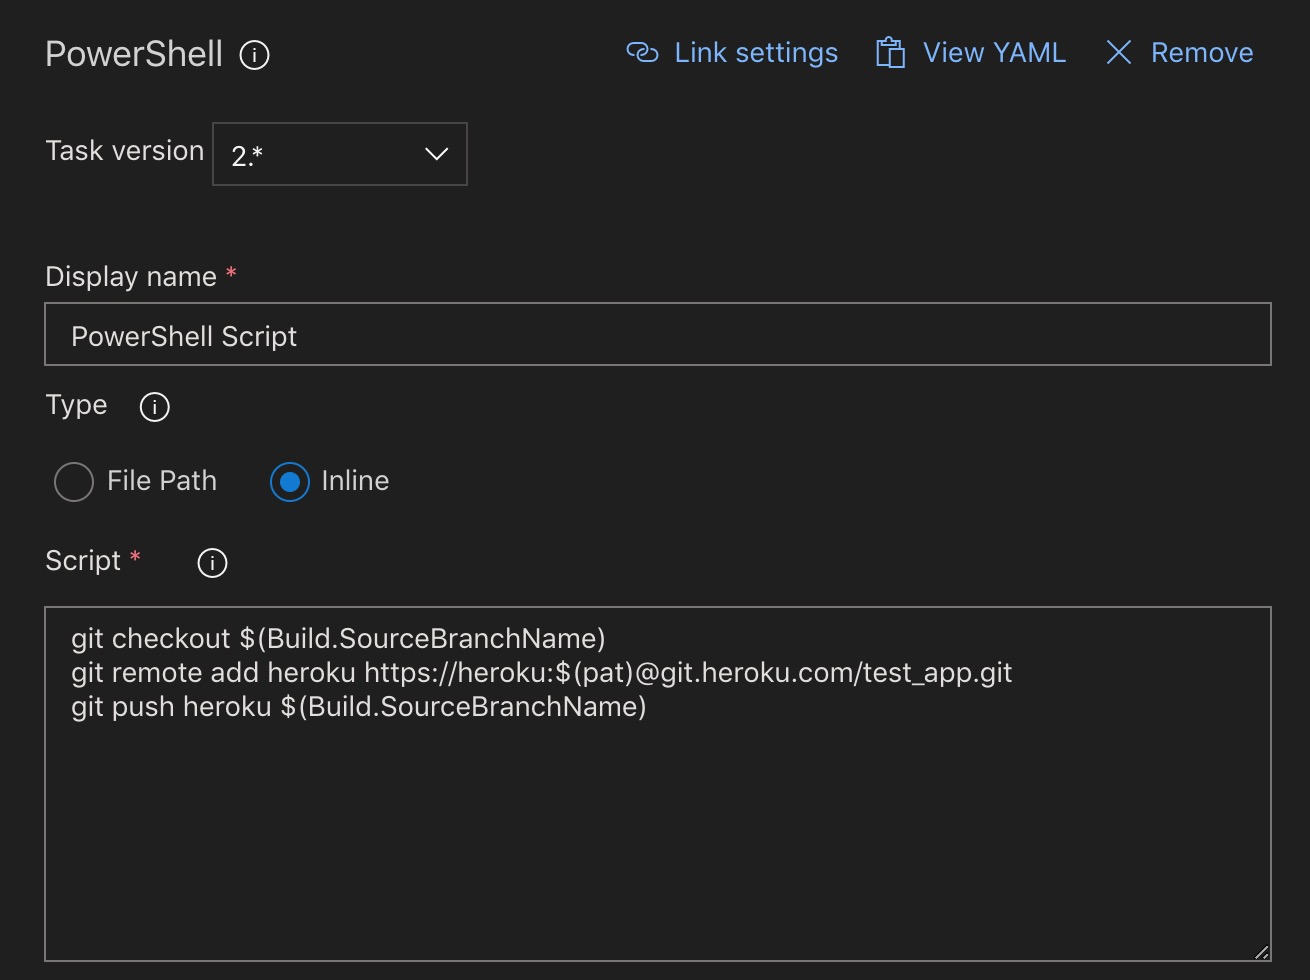
Figure 12 - Inline Powershell script to push changes to Heroku
It’s a good idea to doublecheck your work at this point. When you are confident that everyting is configured correctly, Save & queue your build as shown in Figure 13:
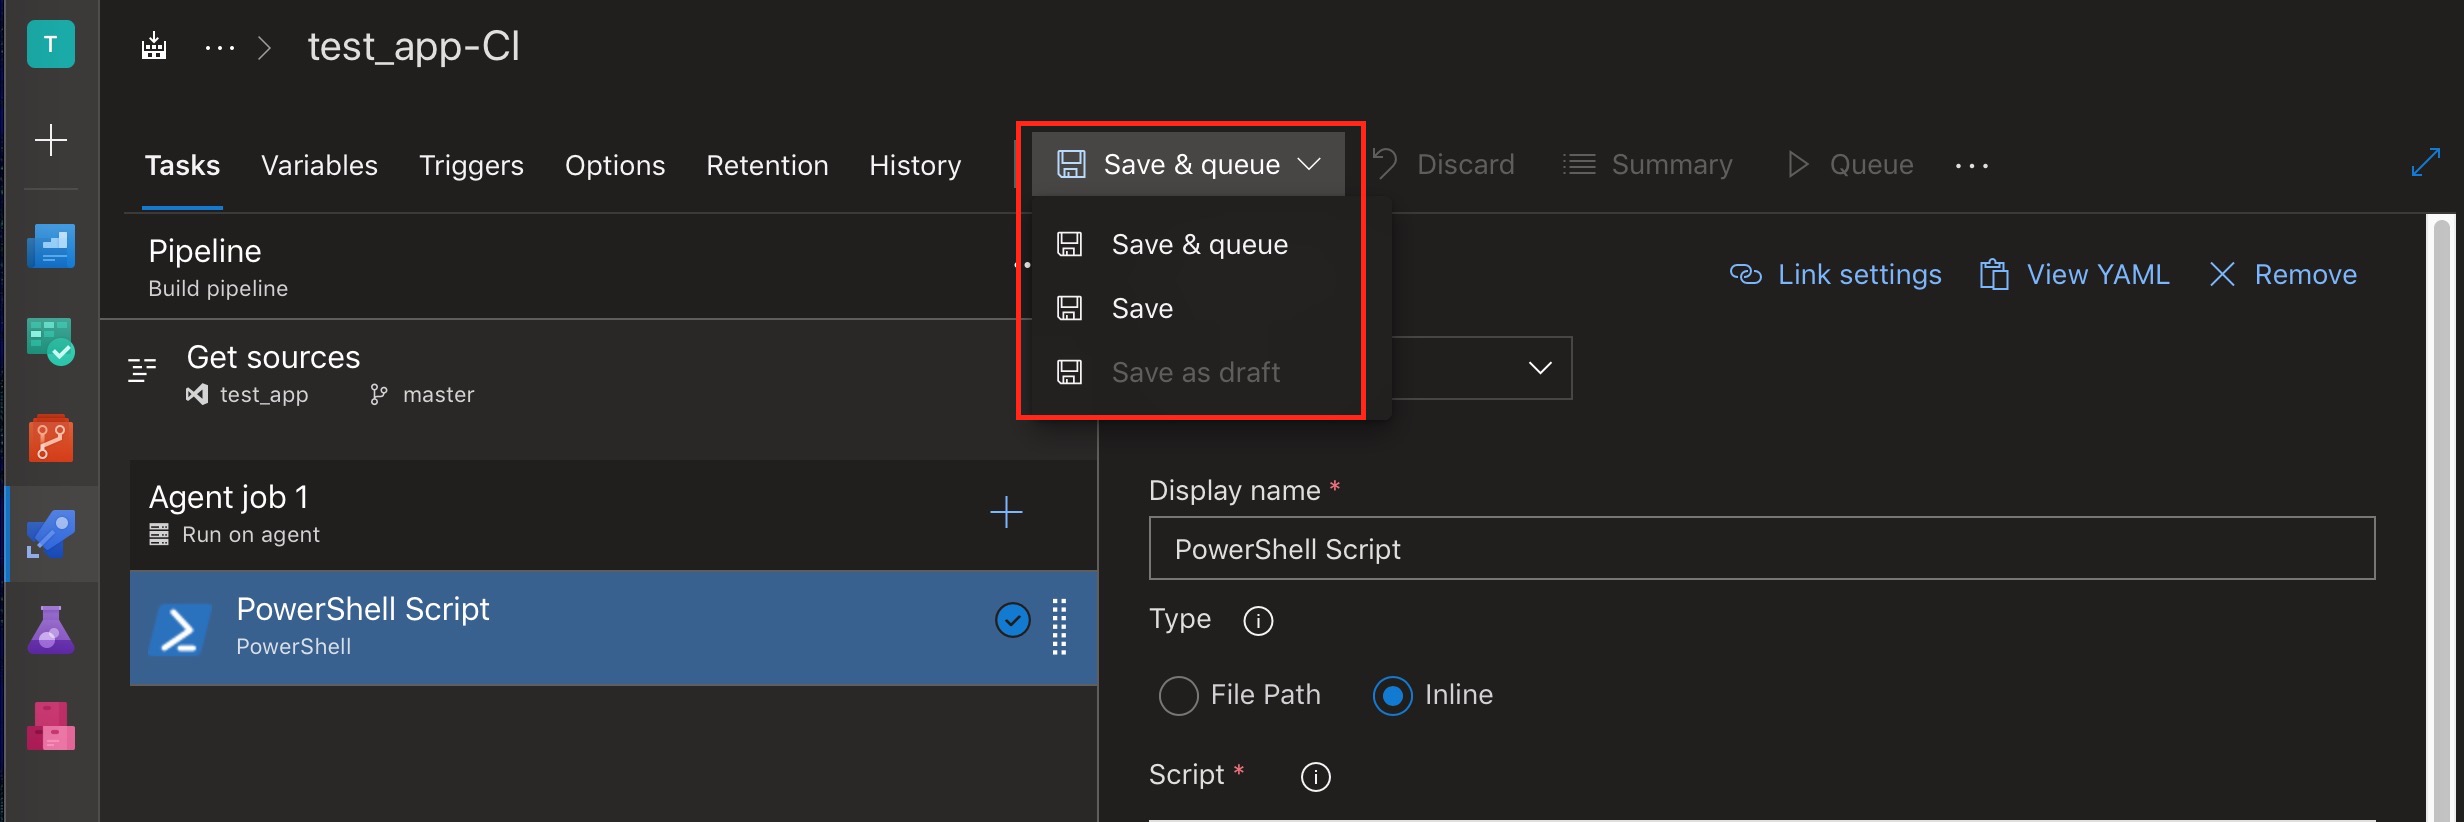
Figure 13 - Save pipeline and queue build
Verify Deployment
After the build is queued, click the link that appears, This will take you to build logs which update live as the deployment is running. If everything was configured correctly, you should eventually see that every step of the build pupeline succeeded as shown in Figure 14:
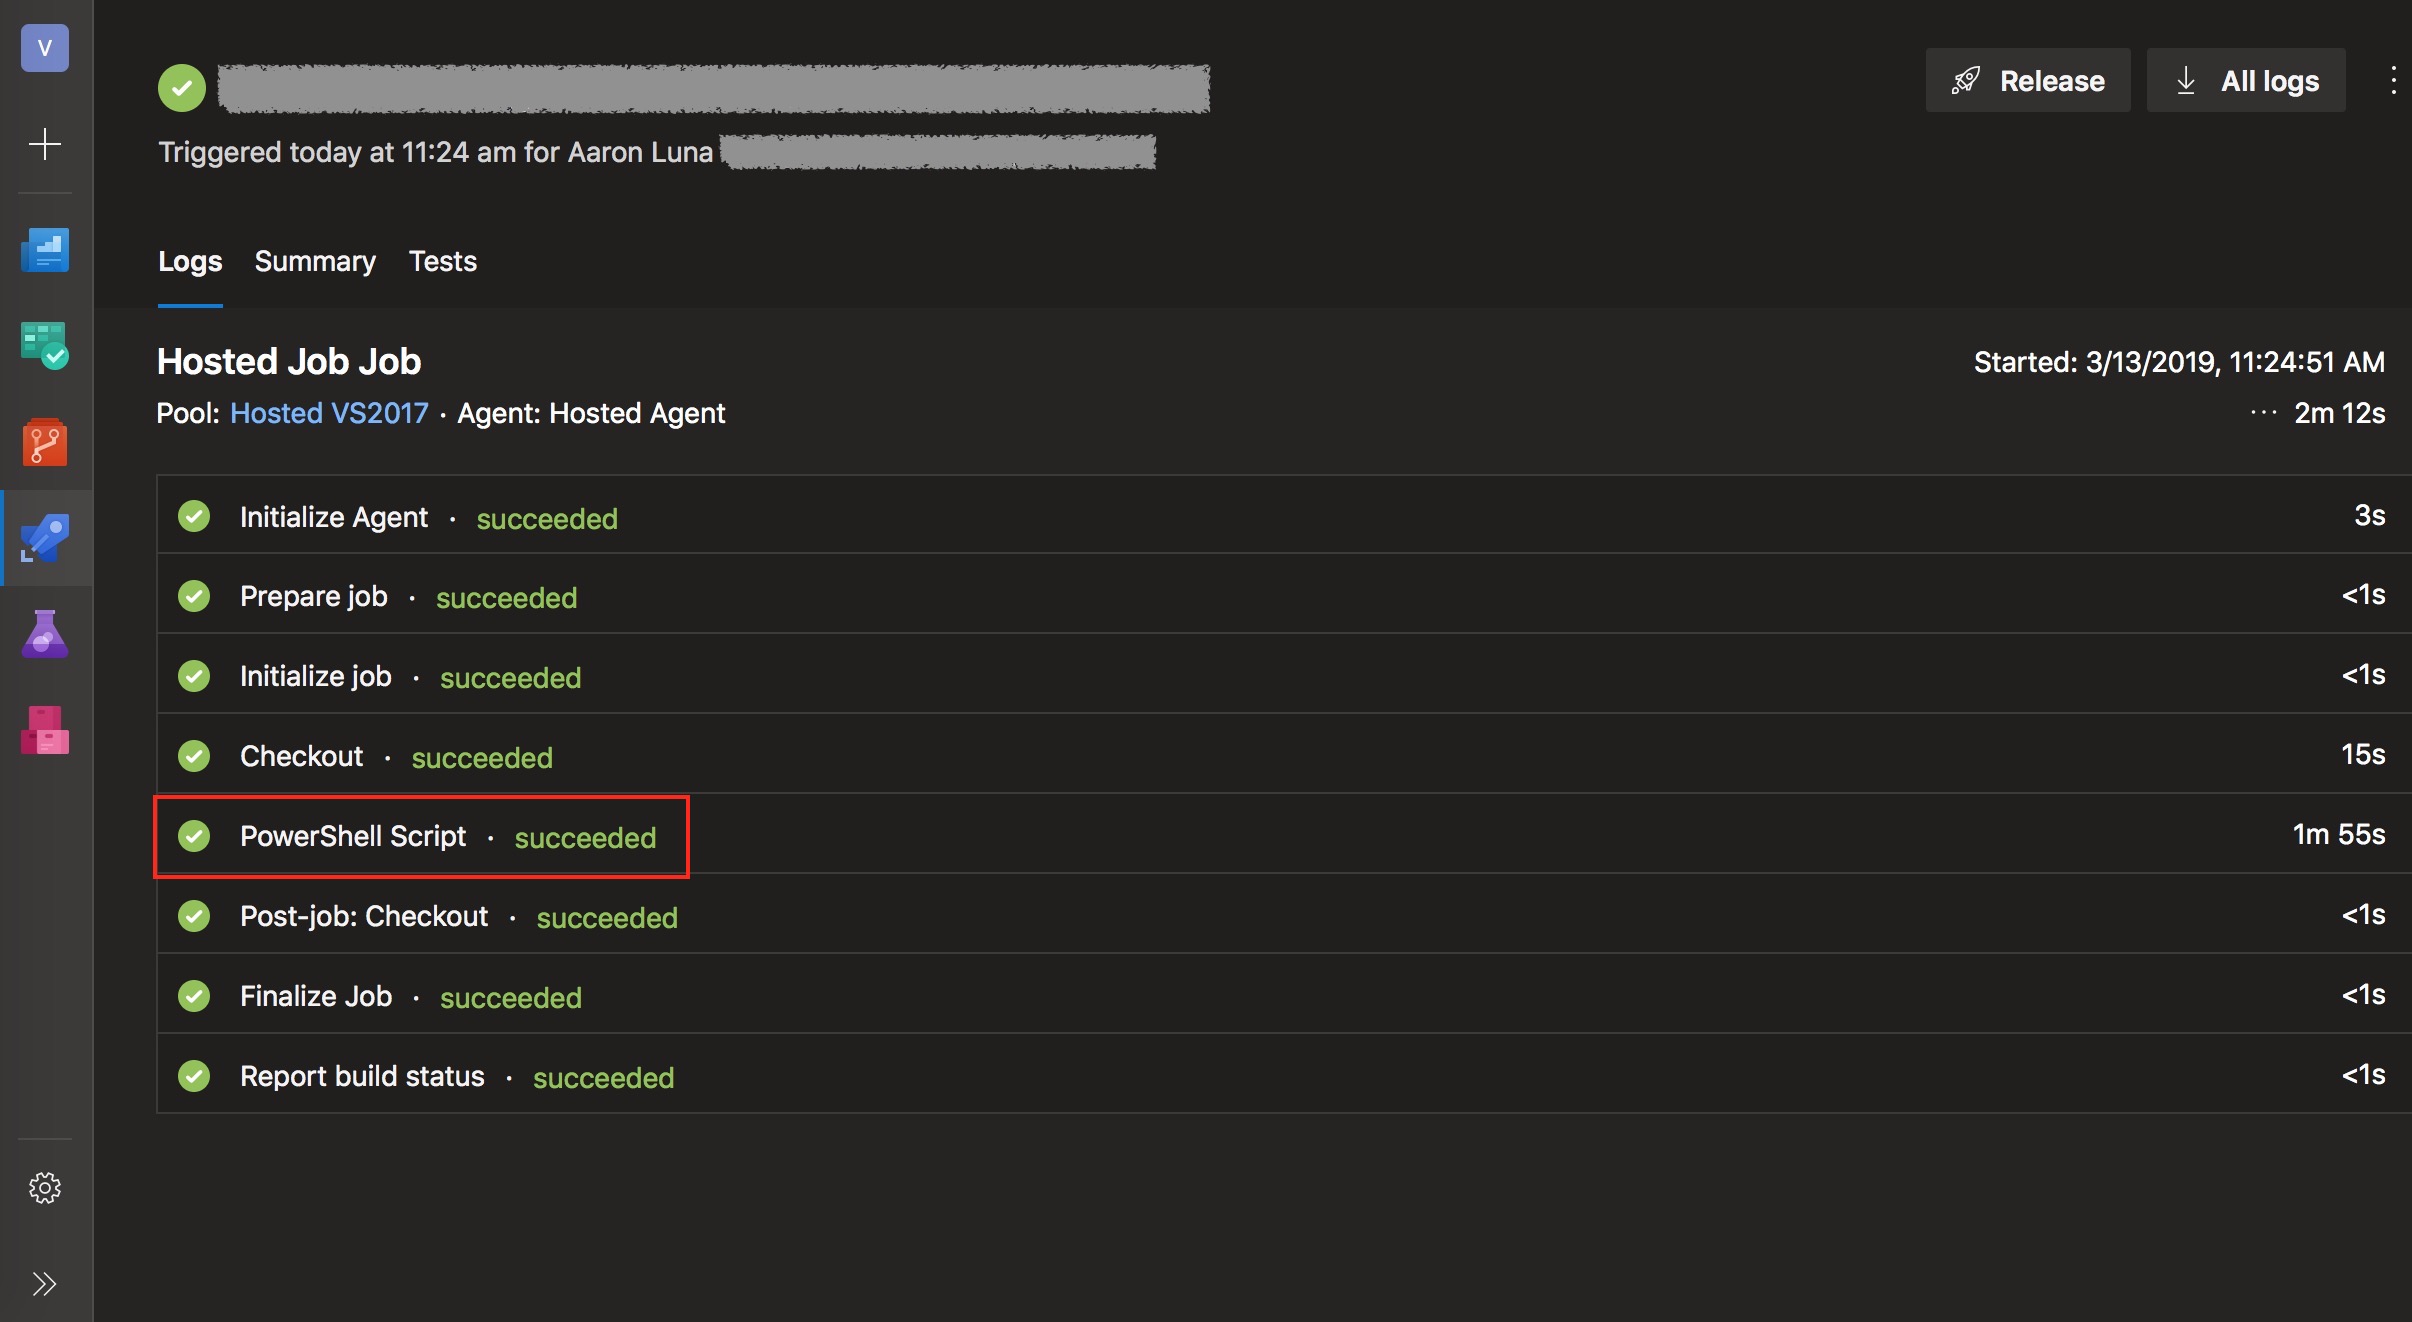
Figure 14 - Successful build logs
To see detailed logs for the Heroku deployment process, click on Powershell Script. Scroll to the bottom of the log in the popup that appears and you should see something similar to Figure 15:
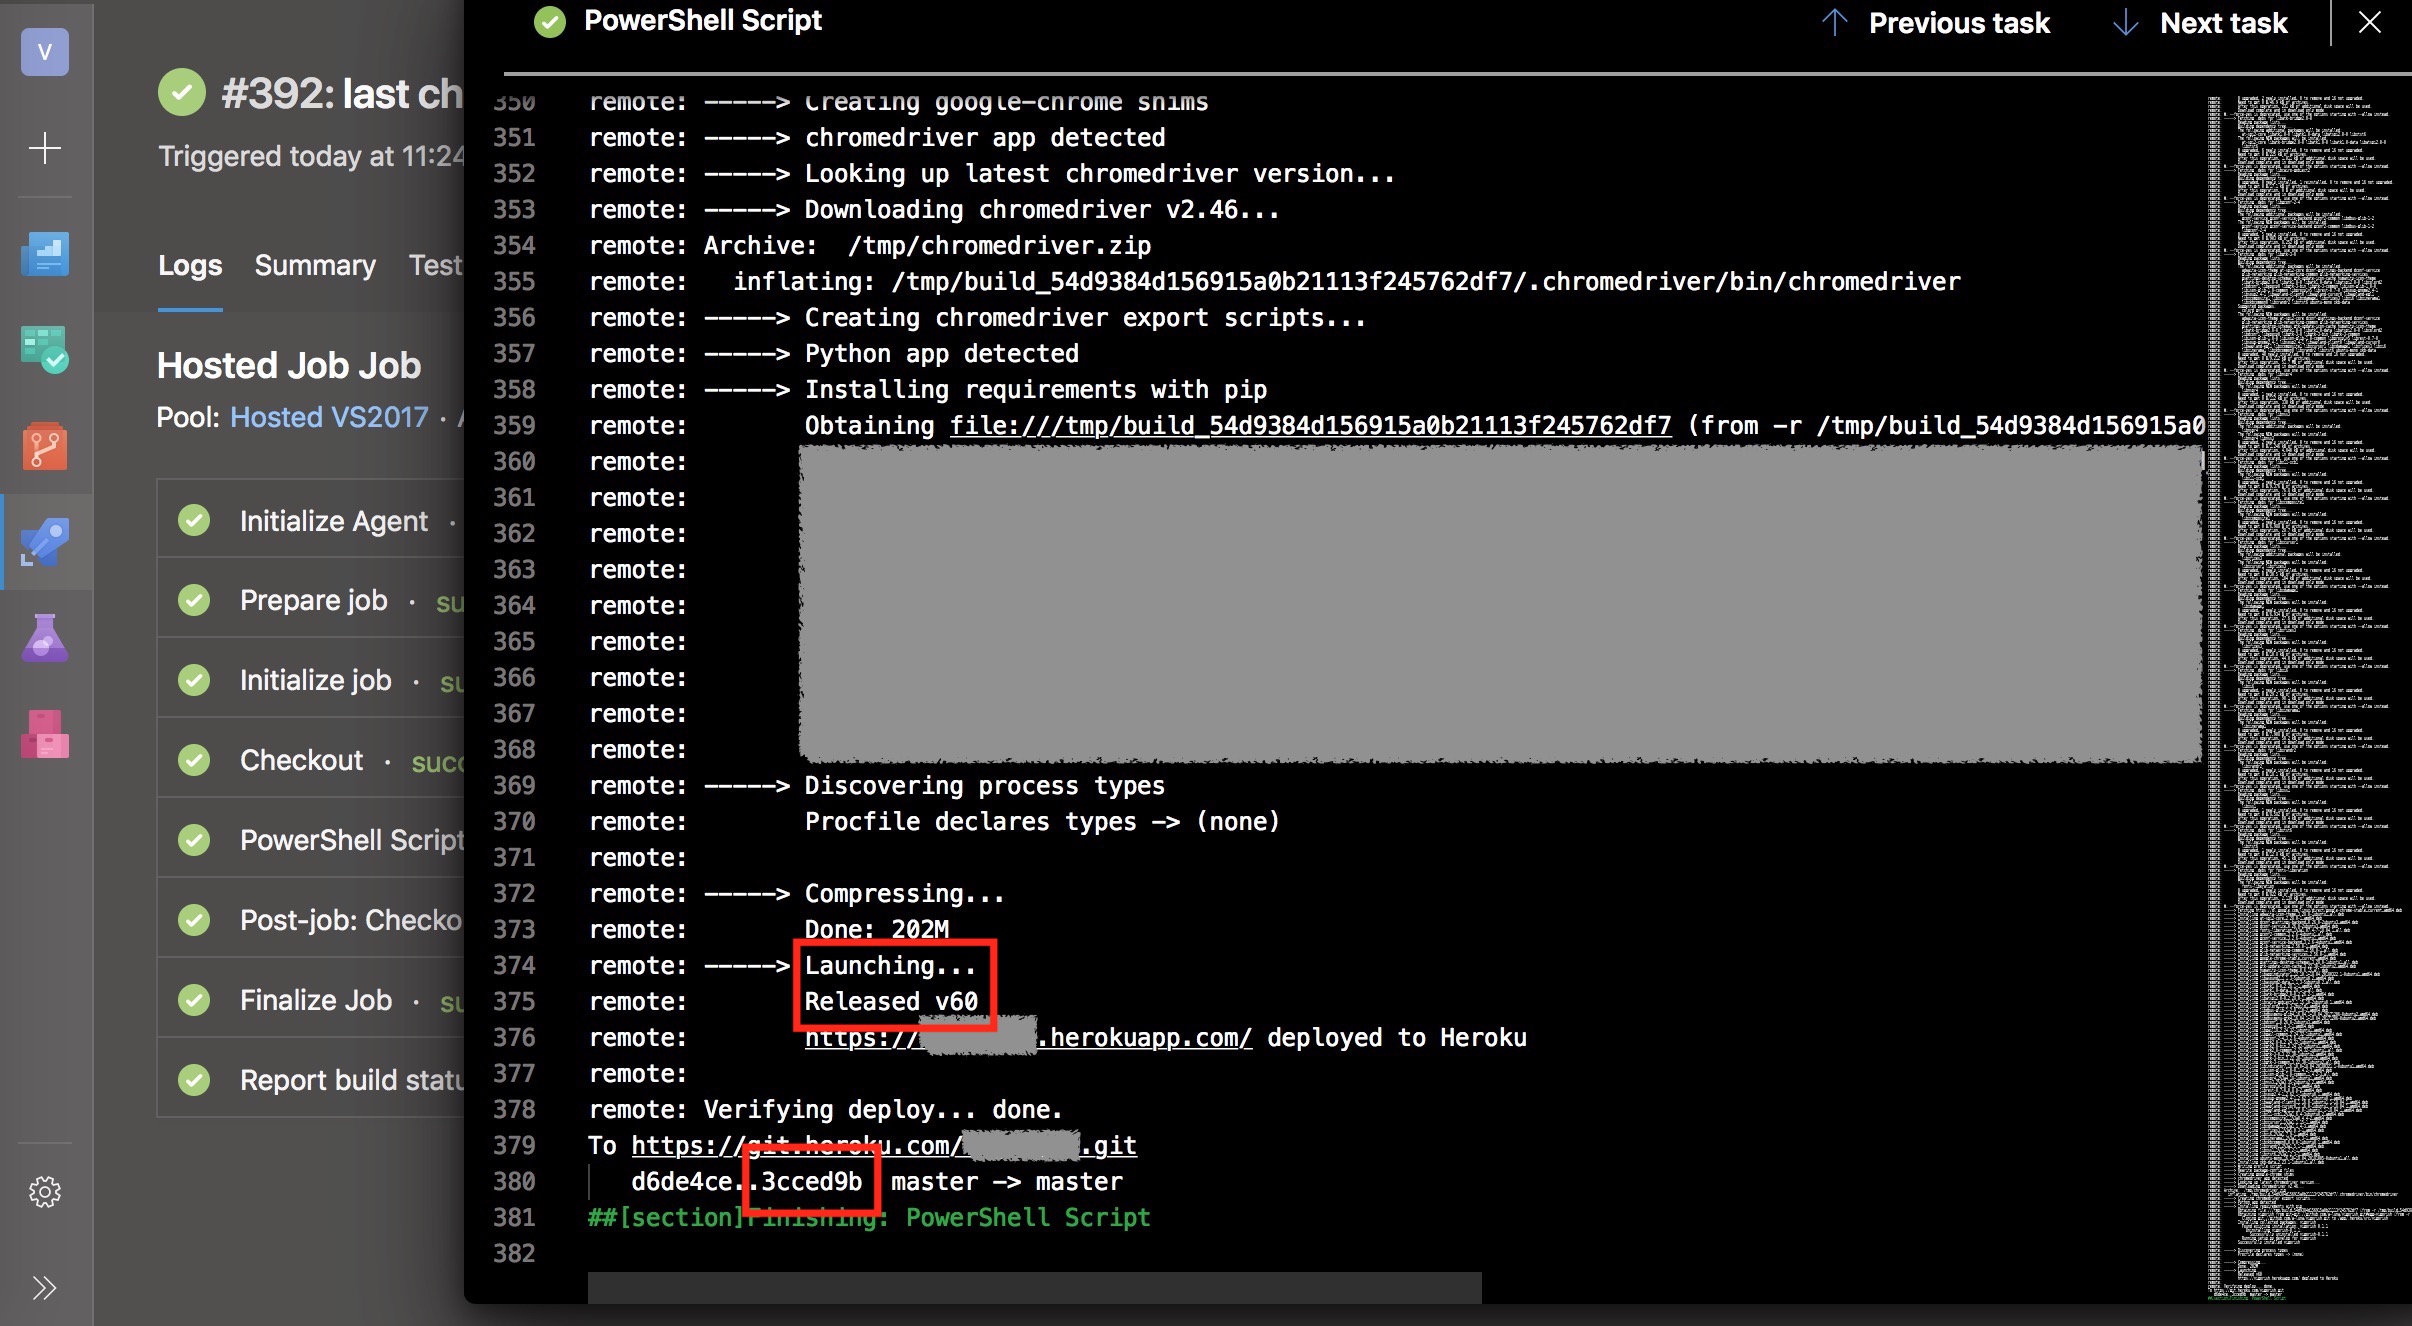
Figure 15 - Heroku deployment logs
Note the revision number (v60) and commit ID (3cced9be) in the Powershell logs. You can confirm these same details in the Activity stream for your Heroku app (Figure 16):

Figure 16 - Heroku activity stream
Conclusion
To sum up, Azure DevOps provides a simple way to create a continuous deployment process for your Heroku app. The most important points to remember are:
- Enable continuous integration in the Triggers section of your build pipeline. If you forget to do this, your build process will fail to trigger when a new commit is made.
- Create a Heroku API token that is only used for authenticating automated deployment tasks.
- Add the API token as a secret variable to your build pipeline to prevent the token from being displayed in log messages.
- Inspect the log messages for your build if any errors occur.